Sharpening Carving Knives and Woodworking Tools: Complete Guide!
Published on: June 15, 2024
Reading time: 14 minutes

Hi there guys! This month I thought I would talk about a topic that is an obsession for many, almost as much as finding the best carving knives! It’s, sharpening! So, sit back and relax as I try to uncover EVERYTHING there is to know about sharpening carving knives and all woodworking tools!
If you’ve already browsed the Blog or are my loyal readers (😘), you know I like to provide articles as useful and comprehensive as possible. I hope this can be a manual you’ll return to whenever you have doubts!
To ensure I don’t give you any misleading information, since I’ve often mentioned that in 4 years I’ve never seriously sharpened my knives, and I am therefore not what you might call an expert in the field, I decided to play the help from home and involve the good Takahama.
Together, with me describing the processes and him providing video support, we’ve created this guide by testing the procedures ourselves, thanks to the substantial professional equipment he has available. 😎
But don’t worry, as Mr. M-stein’s tips from the previous article say, any sharpening can be done manually and mechanically. So, it’s within everyone’s reach. Shall we begin?
Why Sharpening is Important
First of all, let’s talk about why it’s so important to keep your tools sharp. Think about how frustrating it is to work with a dull blade: it tires you out, makes the work more difficult, and worse, it can ruin your projects!
A sharp tool, on the other hand, allows you to work precisely, reduces effort, and gives you better results. Moreover, it’s also a matter of safety: a sharp tool is more controllable and less likely to slip.
However, not everyone necessarily has to sharpen. From the many comments we’ve received from our respective followers, we’ve understood that there is a small but crucial piece of information that isn’t clear enough, otherwise, this obsession wouldn’t make sense…
Knives, as well as all other tools, need to be sharpened ONLY if something severe happens! So, if your knife falls and gets damaged, or if you use it improperly on an unsuitable or too hard material and holes form in the edge when you look at it against the light.
These are the cases when you necessarily have to turn to sharpening. To recover your knife and bring it back to tip-top shape! In every other case, which we can calmly say covers your normal carving or woodworking activity, you only need to HONE the edge of the blade.
That is why I tell you in my articles that I have never sharpened! I have always kept the knife in excellent condition. I have never forced it to be used improperly, and I have always refreshed the blade before every job (and in some cases even during!).
So now you see that the topic shifts to another level, and you may wonder, then:
What is the difference between honing and sharpening?
When a blade (of any tool) doesn’t have particular problems, but you only feel a slightly reduced cutting ability or a less clean cut, it’s time to hone. I personally recommend doing this at the beginning of your carving session.
If you have a good knife you will almost certainly be able to complete your project without needing further brightening, if not, no problem, it is a task that can be done in a few minutes as often as needed!
To hone the edge, you typically use a leather strop or slip strop, or similar. If you don’t know what this is, I will give you an image that will surely come to mind. Have you seen in movies, when there’s a barber? Before starting to shave, he takes a long leather strip and sharpens the knife, then starts. That’s a strop.
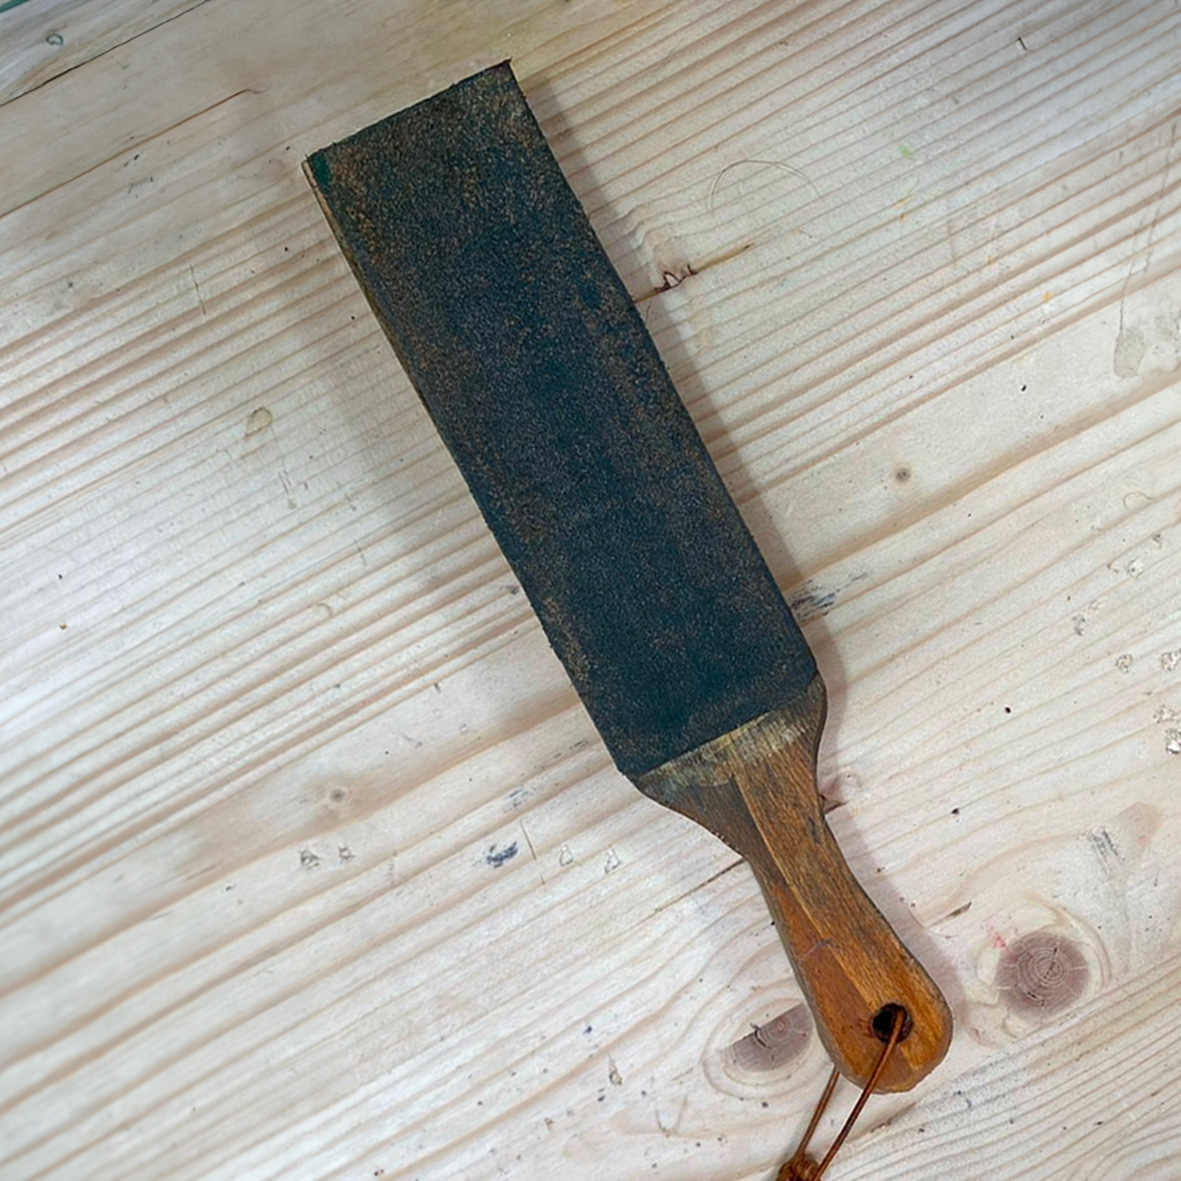
You can easily make a strop at home or buy one. For convenience, for carving knives, it’s usually a wooden board with a piece of leather attached and an abrasive compound like green paste (chromium oxide) or white paste (aluminum oxide).
If you’re interested in making your own strop, here’s a link to Takahama’s video, which will explain how to do it. If you prefer to buy one, there are different types on the market, and you just have to choose the one that best suits your needs. In any case, here’s:
How to hone a blade with a Strop
Using a strop to sharpen your carving knives is a simple process but requires attention to detail to achieve the best results. Here’s a summary of the small precautions and tips I recommend applying during the operation.
First, make sure the leather surface is clean and free of dust or dirt. Then, apply the chosen abrasive compound to the strop’s surface. This compound helps polish the knife’s edge. Use a moderate amount and spread it evenly.
Now imagine holding the knife with both hands, one on the handle and the other near the blade to guide it. Place the blade edge on the strop and start pulling the blade towards you, away from the sharp edge. Do this slowly and carefully, repeating several times on each side. But let’s see the operation in detail:
Knife Positioning
Keep the knife at an angle of about 15-20 degrees to the strop’s surface. This is the ideal angle for most carving knives. (To be sure of the angle, ask the manufacturer directly)
Ensure the entire length of the blade edge touches the leather. If you’re sharpening a curved blade, like a hook knife, you’ll need to slightly rotate the knife during the pass to maintain contact with the leather.
Movements
- Traction: Unlike the sharpening stone, which we will see later, you should always pull the blade on the strop, simulating a cutting motion but in reverse. This means you should move the blade away from the sharp edge, so you don’t cut the leather.
- Stroke: Pass the knife along the strop with long, even strokes. Start from the base of the knife and pull to the tip. Repeat this motion several times on one side of the blade.
- Repeat on the Other Side: Once you have stroked one side of the blade several times (I find 10-15 strokes ideal), turn the knife and repeat the process on the other side.
- Uniformity: Ensure you sharpen both sides of the blade evenly to maintain a balanced edge.
After these steps, test the knife on a piece of wood to check if the edge is sharp enough. It should cut easily and effortlessly. If the knife doesn’t perform as desired, repeat the process until satisfied! See? It’s all very simple!
I recommend cleaning your strop after each hone to keep it always ready and in good condition. Remember that even a few quick passes are often enough to keep your knife in optimal condition!
By following these 4 steps, you can keep your carving knives sharp and ready to use, greatly improving the quality of your carving and reducing the effort needed to cut wood. You can be sure of that!
But since this is a comprehensive guide let’s move on to the serious cases and how to take action on all the, damaged, woodworking tools that came to my mind!
Sharpening woodworking tools
There are several tools that a woodworker or carver uses on a daily basis, and each one requires some attention. Here’s what we’ll sharpen together:
Let’s start with the king, the most delicate one!
Sharpening Carving Knives
As I mentioned at the beginning of this article, there are two types of sharpening: mechanical and manual. Here I briefly explain the main steps of manual sharpening, which is accessible to everyone since you only need a few types of stones that are easily available.
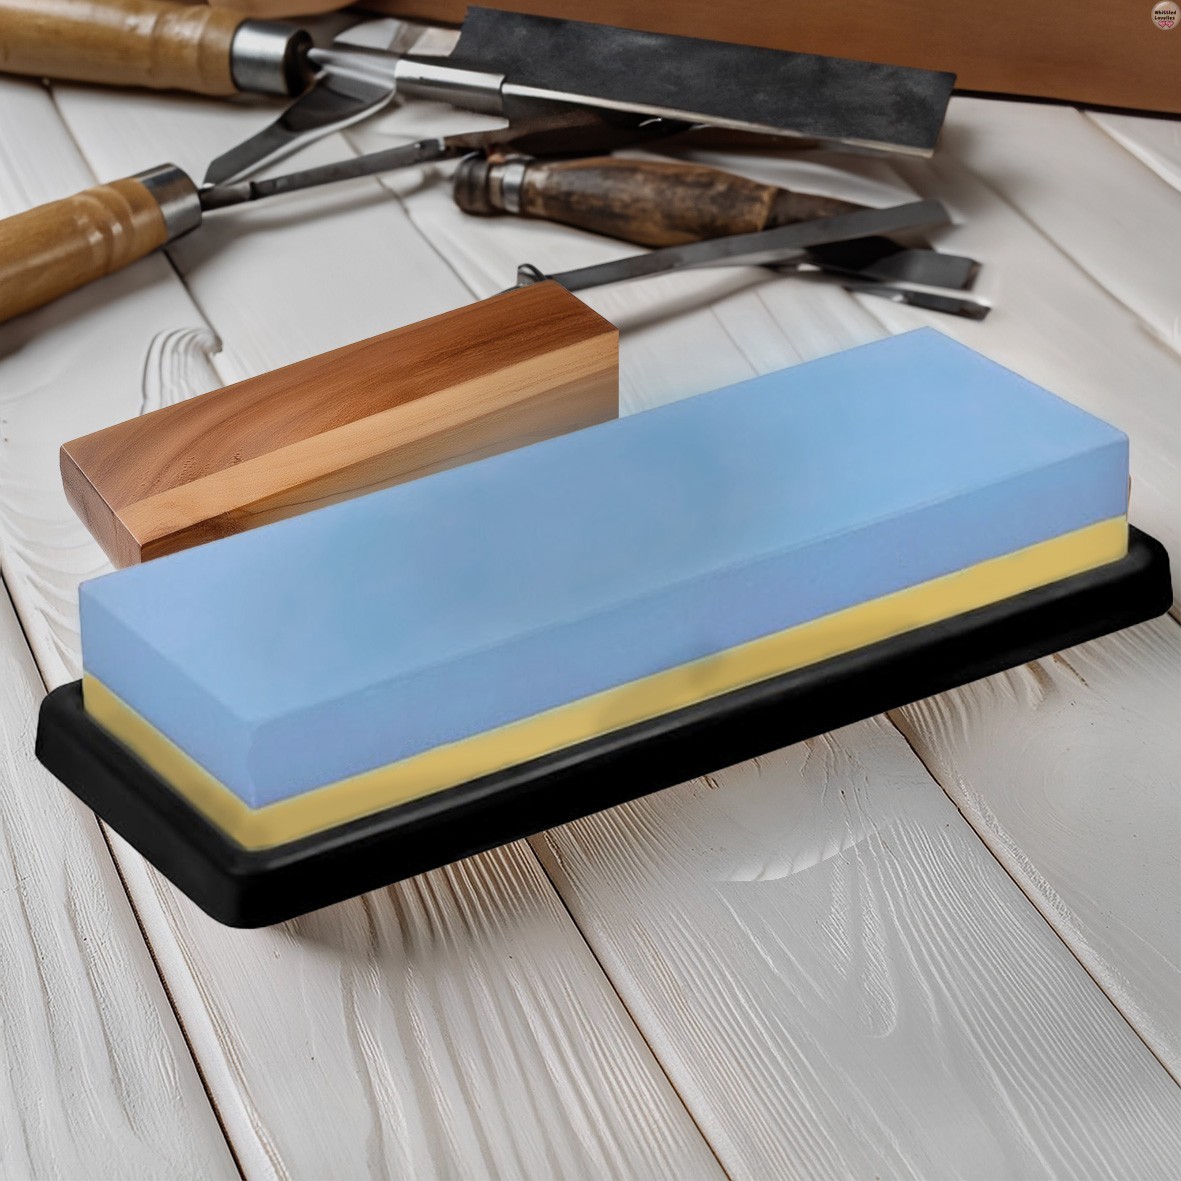
- Use a fine-grit sharpening stone, wet. Maintain an angle of about 20 degrees.
- Pass the blade over the stone with circular and uniform movements.
- Finishing. Use an even finer stone or a leather strip for finishing. This will give the knife a razor-sharp edge.
And here’s where Takahama comes to our aid. He has prepared a video showing all the necessary steps to manually sharpen a knife and shaped gouges with stones.
The full video also shows a brief part dedicated to mechanical sharpening. If you are particularly interested in this type of sharpening, have the necessary tools, or are considering setting up an equipped workstation in your workshop, you’ll find this video on Takahama’s channel as well:
Sharpening Chisels, Gouges, and Planes
These tools are perhaps a bit more challenging to sharpen due to the particular shape of the tips, but again, nothing impossible! First of all, it’s more practical to securely fix the chisel or gouge in a vise or a support. If it’s mini/micro palm tools, hold them securely in your hand.
- Start with the coarse-grit stone. Pass the blade with back-and-forth movements, maintaining an angle of about 25 degrees. Don’t worry if it’s not perfect right away, it takes some practice.
- Move to the fine-grit stone. This is the moment when you really polish the edge. With the same movements but a lighter touch, sharpen the blade until it’s perfectly sharp.
- Test the result. Pass the chisel or gouge over a piece of wood. If it cuts like butter, you have done a great job! 🎉
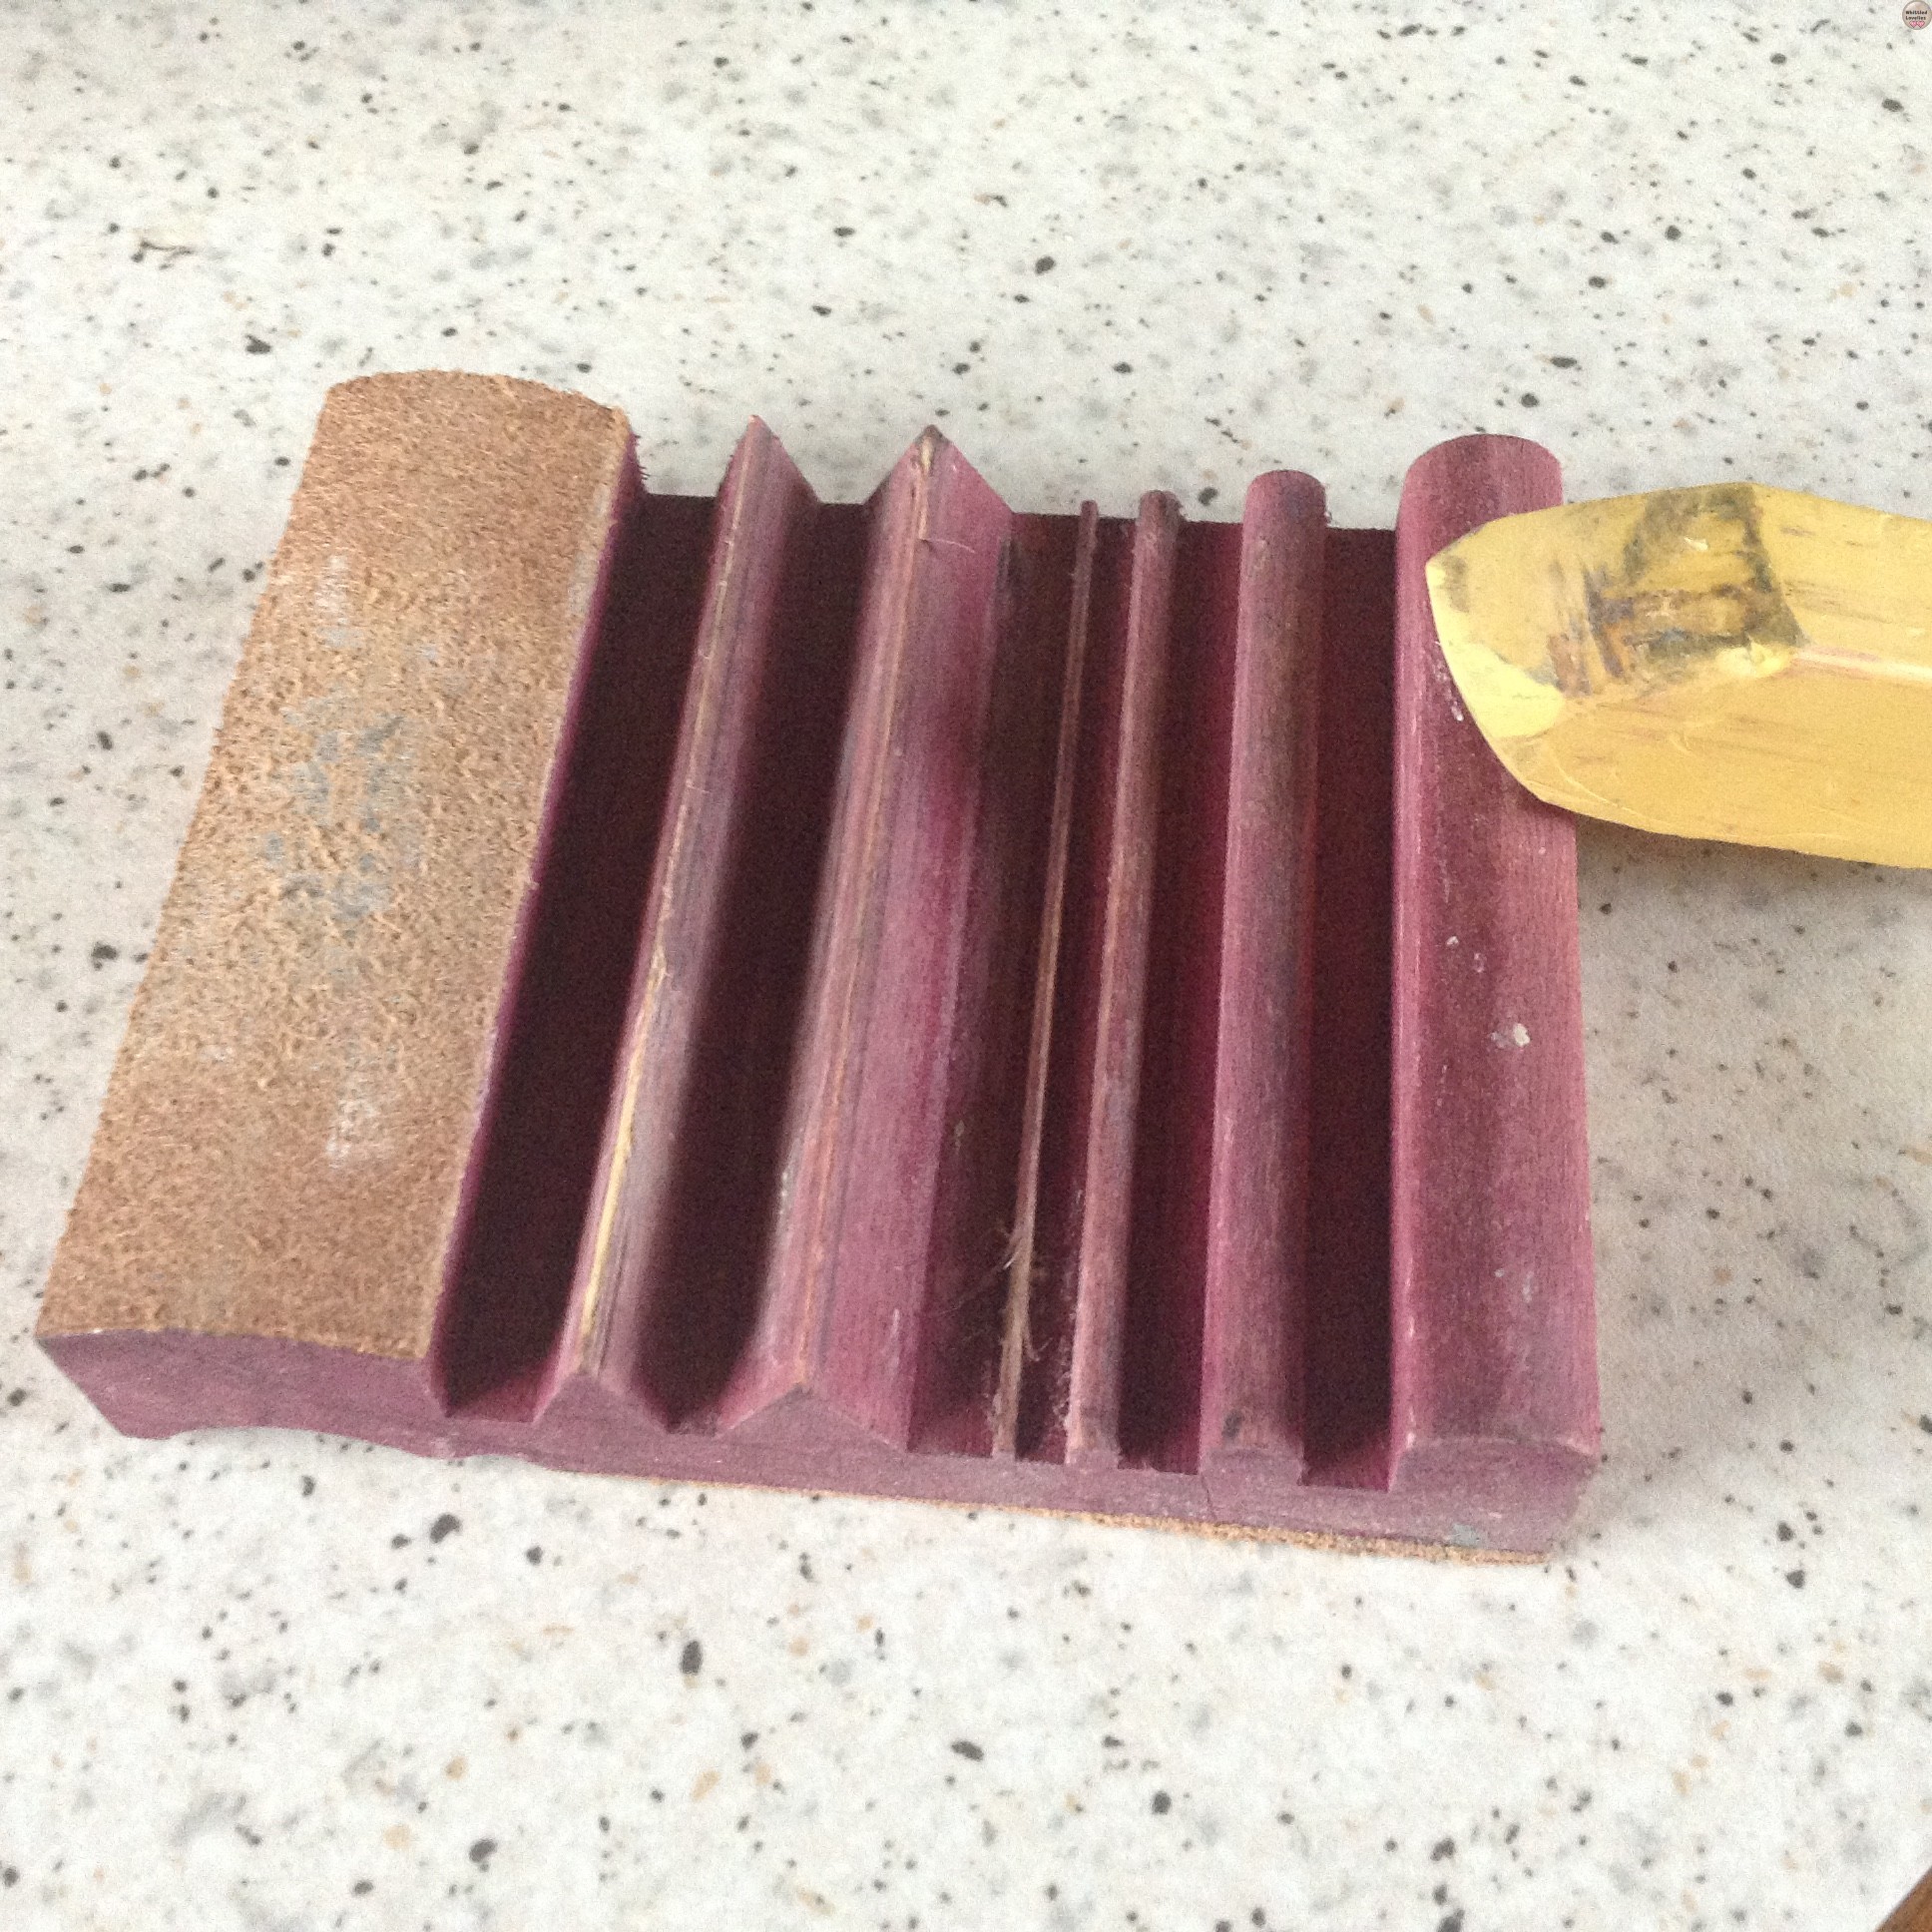
Remember that for these tools, too, a good brightening with the strop is advisable if they don’t have serious issues. For palm gouges, I find the Flexcut slip strop very useful (I receive no compensation from Flexcut for this and other related tips) because of its contoured profile that fits perfectly into all kinds of shapes.
For the plane, there’s a slightly different process. First, you need to remove the blade from its holder. Once secured in a vise, proceed as described above, ensuring the edge is perfectly straight.
Sharpening Axes, Hatchets, and Adzes
We need to see this operation as sharpening a knife with a huge blade, as you may have guessed, the steps are similar for each tool, so everything can be tackled easily. Let’s start with the
Manual sharpening
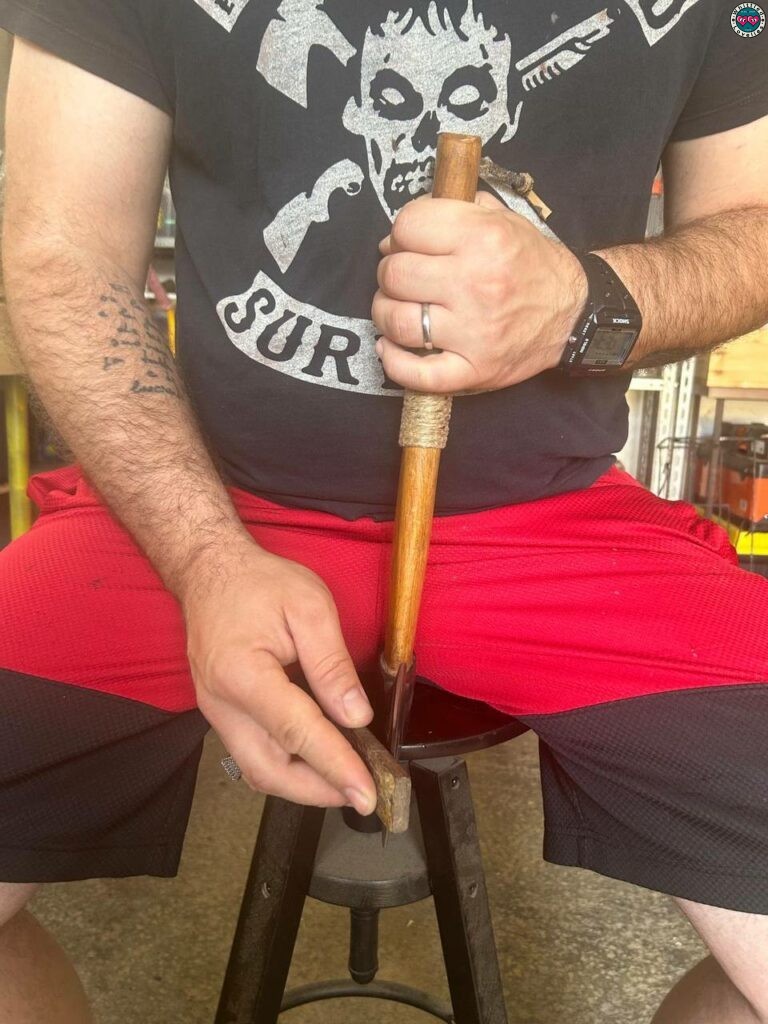
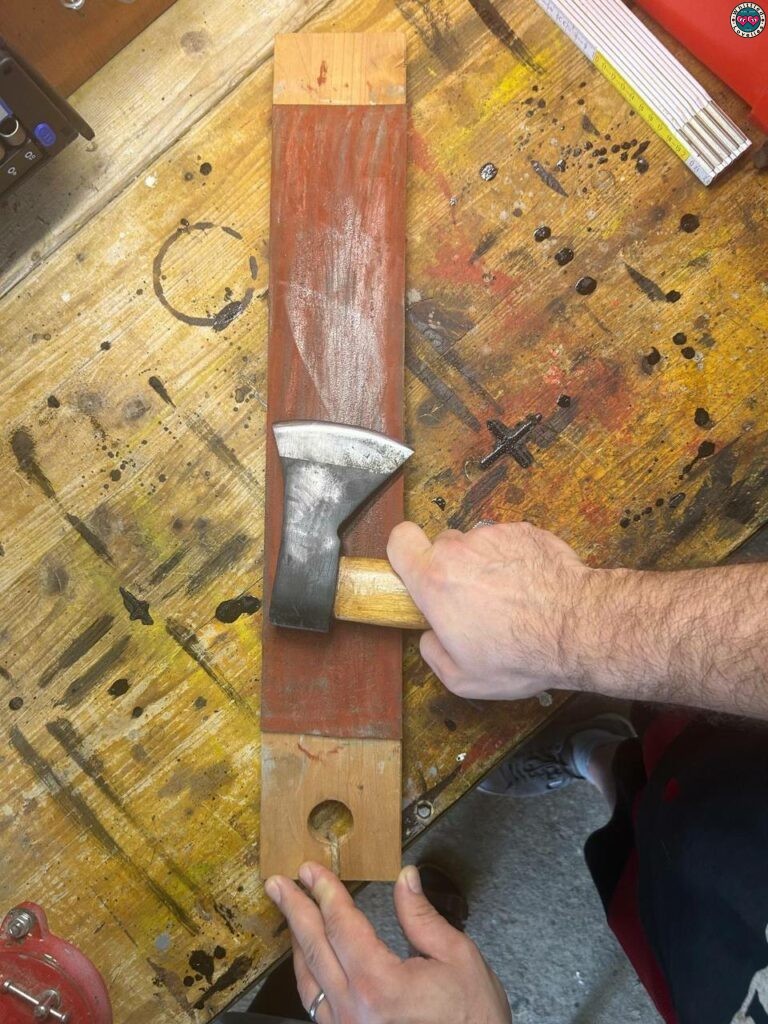
First, make sure the axe is well secured. You can use a vise to hold it steady while you work. If you don’t have a vise, you can lay the axe on a stable surface and hold it steady with one hand, as in the photos, but be very careful not to cut yourself!

- Get your flat file or coarse-grained sharpening stone. Place the file or stone against the blade at an angle of about 20 to 25 degrees. This is the right angle for most axes. If you are not sure of the angle, use a trick: make a line with a marker on the bevel, this way you will always know where and when you are taking away material, if you pass the stone and the color disappears you have found the correct angle!

- Now, with steady and even movements, run the file along the blade edge, following the original angle. Sit with the hatchet handle pointing upwards and the blade downwards. This will align your eye with the hatchet bevel, so you can see the angle clearly. This way, you’ll sharpen the right side of the blade from your perspective.
- If you opt for the stone instead, use it only after soaking it for about 10 to 15 minutes in water. Place it at the bevel angle and start rubbing in circular motions. Work on one side of the blade for a few minutes.

- Then switch to the other side. Try to keep the same number of passes on each side to make sure the edge is even. Turn the axe over, this time with the handle facing down and the blade facing up. Lean against the chair top for more stability.
- It’s time to use the strop! (Make sure it’s the right size for the blade 🤣). If you kept the sharpening angle constant for both sides, you should feel a “burr” when running your nail along the bevel. This is the “dead edge.” Be careful, as the blade is already sharp at this stage!
- Choosing to use the strop: apply abrasive compound to the leather and start moving the blade from outside to inside in a semi-circular motion.
- Or, you can continue with a fine-grit stone. Apply some honing oil to the stone (if you have any) and repeat the process, maintaining a 20-25 degree angle. This will make the blade even sharper and smoother.
When you think you’re done, it’s time to check the edge again. Gently run your thumb along the edge (not on the edge! 😅). This time, it should feel smooth and sharp. A good trick is to use a piece of paper and try to cut it with the hatchet: if the cut is clean, you’ve done an excellent job! 😎
Mechanical Sharpening with a Grinder
- Use a jig: Mount the hatchet on the jig and adjust the height and distance to find the correct angle. If using a combination grinder, mark the bevel with a marker and rest the blade on the stone.

- Check the angle: Hold the hatchet with one hand and rotate the grinder wheel (while it’s off) with the other. After a few turns, check if the marker is removed evenly from the bevel. If so, you have the right angle. If not, continue adjusting.
- Add water: Fill the grinder’s reservoir with water and let it run for 3-4 minutes to soak the stone well.
- Initial sharpening: Mount the blade on the jig and make 1-2 passes on the grinder. For a combination grinder, memorize the correct angle and make 1-2 passes by hand. The jig pass will be more precise than the hand pass.
- Flip the blade: Remove the hatchet from the jig, flip it, and repeat the sharpening for the other side. With the combination grinder, simply rotate the hatchet and make another 1-2 passes.
- Final check: After making enough passes, check if there’s a “dead edge” along the entire length of the blade. If present, you’re ready for the strop.
- Leather wheel: Use the professional grinder’s leather wheel or a strop for finishing.
The same procedure described here for sharpening a hatchet can be applied to other blades. Just adjust the angles as I’ve described for each tool, and you’re all set!
Sharpening Saws
Even though saws are among the tools that need sharpening the least, sometimes you might need to bring them back to their former glory. Sharpening a saw might seem complicated, but with a bit of patience, you can do it.
- Secure the saw firmly. Use a vise or support.
- Use a triangular file. File each tooth at about a 60-degree angle. This requires some precision, so take your time.
- Check your work. Each tooth should be sharpened evenly. A well-sharpened saw makes cutting much easier and cleaner.
Sharpening Chainsaws
From saw to chainsaw, it’s a small step! Things are a bit more complicated here, but with the schematic and detailed guide, you’ll soon get the hang of it.
- Ensure the chainsaw is off and disconnected from the power source (if electric) or that the fuel tank is empty (if gas-powered).
- Secure the chainsaw in a vise or support to keep it steady while you work.
Insight
The cutting angle (or tooth angle) is the angle formed between the tooth’s surface and the chain’s direction of travel. This angle affects the chainsaw’s ability to penetrate the wood. A correct cutting angle ensures a clean cut and reduces the effort needed to cut through the wood.
The depth gauge (or raker), also known as the “guide tooth,” is a small protrusion located in front of the cutting tooth. This component controls the depth of the cut made by the cutting edge. If the depth gauge is too high, the chainsaw will not cut effectively; if it is too low, the chainsaw may cut too deeply, causing vibrations and increasing the risk of kickback.

- Find your round file:
- Usually, when you buy a chainsaw, the package includes a kit with some tools: wrenches for tightening and adjusting the bar, a screwdriver, and a round file. This tool is very important because it allows you to sharpen your chain since it matches the diameter of the cutting edge.
- Identifies the guide tooth:
- Carefully inspect the entire chain of your chainsaw. Each chain has a tooth that is slightly different from the others. This guide tooth will be your starting point for uniformly sharpening the chain.
- Sharpen the teeth:
- Place the round file on the tooth at an angle between 30° and 45° to the chain. You can use a file guide to help maintain the correct angle. (Check the manufacturer’s manual for the proper angle for your chain).
- If you sharpen at the wrong angle, the cutting edge can crack. Even a single point where the chain works improperly can cause the cutting edge to break.
- File the tooth with steady and uniform movements, following the original blade angle. Usually, 3 to 10 passes per tooth are needed.
- Check each tooth to ensure it is sharpened evenly. Each tooth must have the same length and angle.
- If a cutting edge doesn’t have the correct angle, you’ll notice right away because you’ll need to push the chainsaw too hard into the wood.
- Sharpen the depth gauges (or rakers):
- After sharpening all the teeth, check the depth gauges (the small protrusions in front of the teeth). Use a gauge to measure the distance between the rakers and teeth and file them if necessary to ensure they are not too high, following the chain manufacturer’s specifications. The depth gauge doesn’t need to be adjusted every time, but about every 4-5 times you sharpen the teeth.
- Final check:
- Inspect the entire chain to ensure all teeth are sharpened evenly and the depth gauges are at the correct height.
- Remove the chainsaw from the vise or support and test it on a piece of wood to check the sharpness.
Sharpening Router Bits
Router bits for power tools require a bit more attention due to their small size and the number of blades, but with some patience, you can do it!
- Remove the bit and secure it firmly.
- Use a precision file or sharpening stone. Follow the original angle of the bit.
- Check for symmetry. It’s important that both blades are sharpened evenly to avoid vibrations.
Final Considerations and Maintenance of Carving Tools
Without diagrams this article would have been impossible to read! So let’s end on a high note with a nice schematic summary! 😂😇
- Keep the blade fresh. Don’t wait for the tools to be completely dull. Using the strop frequently saves you time and effort!
- Sharpen when necessary. If your tool is damaged, proceed with sharpening immediately. Small defects are easily fixed, but if you let them become severe, the job gets much more serious and complicated.
- Cleaning is important. Storing tools after use always dry and clean prevents rust and maintains blade sharpness, leading to cleaner cuts!
- Keep your sharpening stones clean. A bit of maintenance on the stones themselves will make a big difference.
- Take your time. Sharpening is an art, not an exact science. With time and practice, you’ll develop your own techniques and keep improving in this area too!
As you can see, sharpening your tools requires patience and attention, but in the end, the satisfaction of working with perfectly sharpened tools will be worth all the effort! Happy sharpening! I hope this long article 😵 has been helpful; I look forward to your comments! See you next month! 😘🤗
This is an article written by a human for humans!
All articles in the blog are written by me. No contributors, no people paid to write content for me.
Posts written by guests or friends of the blog are marked under the title with the words “guest post.” These are friendly collaborations, contributions to the carving community.
No AI (artificial intelligence) support is employed in the writing of blog articles, and all content is made with the intent to please humans, not search engines.
Do you like my content?
Maybe you can consider a donation in support of the blog!

Click on the link Ko-fi to access a secure payment method and confidently offer me coffee or whatever you want!
From time to time, in articles, you will find words underlined like this, or buttons with the symbol 🛒. These are links that help deepening, or affiliate links.
If you are interested in a product and buy it suggested by me, again at no extra cost to you, you can help me cover the costs of the blog. It would allow me to be able to give you this and much more in the future, always leaving the content totally free.