How to make cute Christmas balls
Published on: November 25, 2022
Reading time: 9 minutes
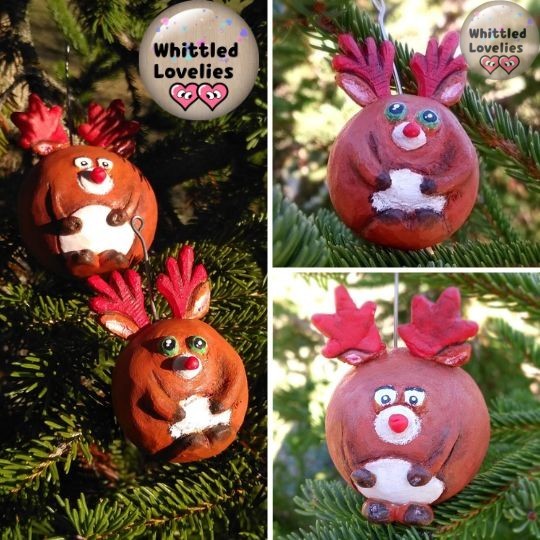
Hello everyone!!! 😄 A lot of time has passed since the last article, and I apologize for that, but a lot of news is boiling in the pot so don’t worry, we will soon catch up with the lost time!!! We are perfectly on time for the usual Christmas article, this year I thought for you a step-by-step guide to create cute Christmas balls to garnish the classic tree or wreaths, so let’s get right to presenting the tutorial!
I am in a lot of pain at the moment because of a nagging tendonitis in my arm, and I am very sad since I can’t apply the strength I need to carve. Just the position of my arm while clutching the knife already hurts so much, so I was thinking that this year I won’t be able to make my decorations let alone prepare my handmade Christmas gifts for my friends 😔.
But as in all self-respecting times of crisis, an idea eventually comes along! I am quite satisfied because this one is super simple and will help anyone: from those who are behind on preparations, to those who are in a hurry or not very experienced in woodcarving. Different types of “difficulty” can be used to finish the project, so it fits perfectly from experienced users to absolute beginners.
Let’s quickly see what we need for this project!
Let’s get started!
First let’s get a piece of carving wood; I chose basswood because it is one of the most workable woods, but also because I had it in my stash! 😉😂😂 I did some testing and found it easier and faster to start with a branch that had the desired diameter rather than the classic square block. I created two balls: one 3 cm in diameter and one 6 cm in diameter.
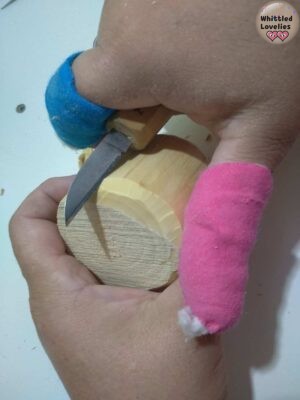
The choice to make two was to show you two different types of approaches that can be used. 3 cm ball is carved totally with a knife. 6 cm ball, on the other hand, was rounded only with the Dremel and the sandpaper tool.
With the Dremel-type drill, the ball is created rather quickly and stays immediately smooth and even without having to sandpaper by hand, of course, but you can’t imagine the amount of dust created. It definitely needs a face mask and is best worked on outdoors or in a well-ventilated garage.
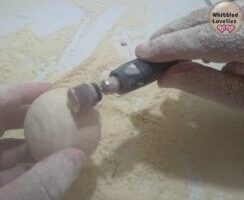
Making a spherical ball is quite a challenge, especially by hand, without the help of a lathe, drill press or drills that have the insert specifically for making balls. With a bit of tweaking, though, it can be done. In case you want a shortcut, there are wooden balls of various sizes for sale and you can get right down to decorating.
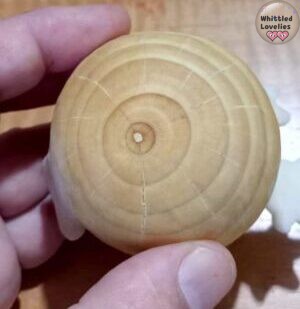
By using, however, a branch as I suggested, it gives you the possibility of having a beautiful center with concentric stripes, and you can think in the decorating stage of coloring only the part with the reindeer and leaving the back natural with just a coat of linseed oil.
Whoops! Until now I had not revealed to you that the absolute star of my balls is of course the ever-present Rudolph the reindeer! For those who have been following me for some time will certainly know that I am obsessed, for everyone else it will be a discovery but boy is it a must, you can’t have a Christmas without reindeer!!! 😂😂😂
Carving phase: creation of Christmas balls!
Now that you know the subject we are going to make devote yourself to making a draft drawing imagining a reindeer so fat that it looks round! I made a very simple drawing trying to make it funny with only a few rather stylized and cartoony elements.
You start with the knife to score the snout and tummy with simple v-cuts (here is the article with the 4 basic cuts, or that of all possible knife cuts) and stop cuts. You dig around to make raised parts move on to carving the arms, again with the same types of cuts.
I also embossed the eyes because I wanted them to look a little crazy, to make the reindeer look funnier. For the nose you can opt to do it separately and apply it with glue since to carve out the nose as well you would have to dig too deep and it would compromise the spherical effect of the balls.
In any case rely on your imagination, skill and intuition. I apologize for my cuts being weak and frayed. And also of the fact that the carving is just hinted at but more at this moment I could not do, I am sure your balls will be beautiful much more than these!
Separately the antlers and ears have to be made, again not to compromise the roundness. So we take a small scrap maximum 3mm thick and draw the shape, and after that simply round out belie inlets and veins to make it a little more natural. A micro v-shaped gouge can help here.
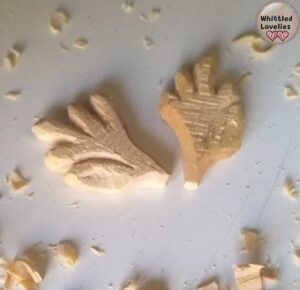
Let’s move on to the feet. If you can get them out by hinting at them, but if you want to make balls that can also “sit” on a table, like these, remember to make them pronounced enough to counterbalance the weight of the antlers.
After a good clean up and generous wiping with sandpaper, we are ready to integrate the horns and then move on to color. With a dremel-type (or knife-point) drill, drill two countersunk holes in the head. In this way:
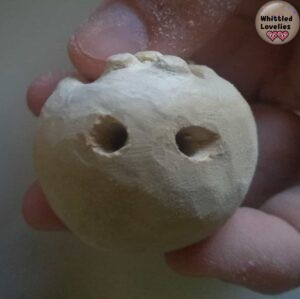
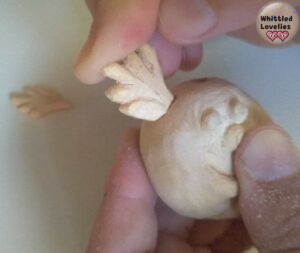
The countersink is to make the ear rest against the head and make the hole as invisible as possible. Once you have verified or found the proper placement, a dab of wood glue inside the hole and squish the ear-ear complex well into their socket.
Here is the finished work ready for decoration of both balls. As you can see, the large ball simply has cleaned up v-cuts and barely noticeable carvings and is much more spherical and smooth than the carved one.
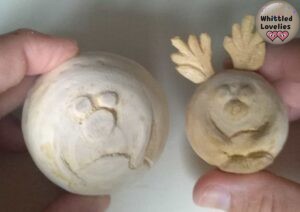
Also consider this depending on what you want to achieve in terms of aesthetics. I honestly really like both types, so I wouldn’t know which one to choose!
The cold porcelain
You may be wondering what cold porcelain is? It is a paste like salt dough, which has the advantage of not degrading or changing with time. It remains smooth to the touch and very stiff when it dries, just like porcelain. The color is very white and does not, like other such modeling pastes, need to be baked. It just needs to be allowed to dry applied for a few hours.
Preparation is really very simple and quick. It only takes very few ingredients and a couple of minutes. On the net you will find many different recipes, one of the simplest versions involves:
- 2 tablespoons of cornstarch
- 2 tablespoons of multi-purpose glue
- 1 tablespoon baking soda
- 2 teaspoons of coconut oil
Use this recipe if it is your first time and you do not dare to venture out, but I assure you that the results, especially for making such small objects, can be obtained even more simply by combining glue and cornstarch. The use of baking soda is recommended for those who want to whiten the dough, but if you use a light oil, or want to paint the objects, in my opinion there is no need.
All ingredients is mixed together in a bowl until a malleable plasticine-like dough is achieved. If the dough is too soft, cornstarch is added, and if it is too hard, oil. I don’t use such an expensive oil, I don’t see the point, just as I don’t see the point of recipes that involve lavender essential oil… 😳🤔
Tips
My advice is to go a bit by eye, two tablespoons for this amount of items is excessive, a couple of teaspoons will do. Put the glue in little by little so that you will feel the dough clumping under your hands and you will hardly need touch-ups.
A drop of oil–I use a very ordinary body oil–is helpful in giving elasticity. My real advice is simply to grease your fingers thoroughly before mixing the ingredients together. That way the dough won’t stick to your fingers so much and you will be able to make a nice dough in no time.
When the dough is of the desired consistency, neither too springy (otherwise you won’t be able to shape it and it will stick everywhere) nor too hard (again because of the difficulty of shaping, the greatest possible risk to breakage or a dough that is not smooth and even), take it out of the bowl and knead it a little bit on a piece of baking paper, again with oiled fingers. As soon as it is smooth and elastic we are there.
Some suggest wrapping it and putting it to rest in the refrigerator for a few hours. I skip this part as well. When I feel the consistency is adequate I immediately start shaping it and have never had any problems. In case you have leftover, store it in the refrigerator well wrapped in plastic film. It will keep for a few days, although you may have to oil it again a bit and liven it up by kneading it.
Have fun creating the nose, antlers and ears, feet and this time I also added hooves to the arms, in short anything you enjoy. Maybe even a pigtail, add it!
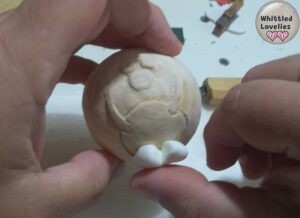
Just take care not to let the elements dry out; rather, create them one at a time and immediately apply them to the wood in the desired positions, helping yourself with multi-purpose glue . To be extra sure that it does not dry out, keep the loaf wrapped in film during the various preparations.
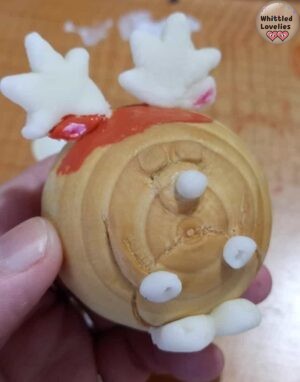
Usually the application is very clean, but in the case of smudges know that they remain invisible under the color that evenly takes the wood and porcelain. However try to clean up, when fresh the paste comes off easily but when dry it will be difficult to remove even with sandpaper!
Final phase: the Christmas balls switch to color!
That’s it, we are quickly heading to the end of our project! When we have our ball ready to go to color, cleaned of impurities and imperfections, we swipe on a gentle coat of linseed oil, which helps the color lay down and protects the wood over time.
This is the creative time, so indulge with acrylic colors and combinations as you like, and be sure to have a bright red nose, we are creating Rudoph!😂😂
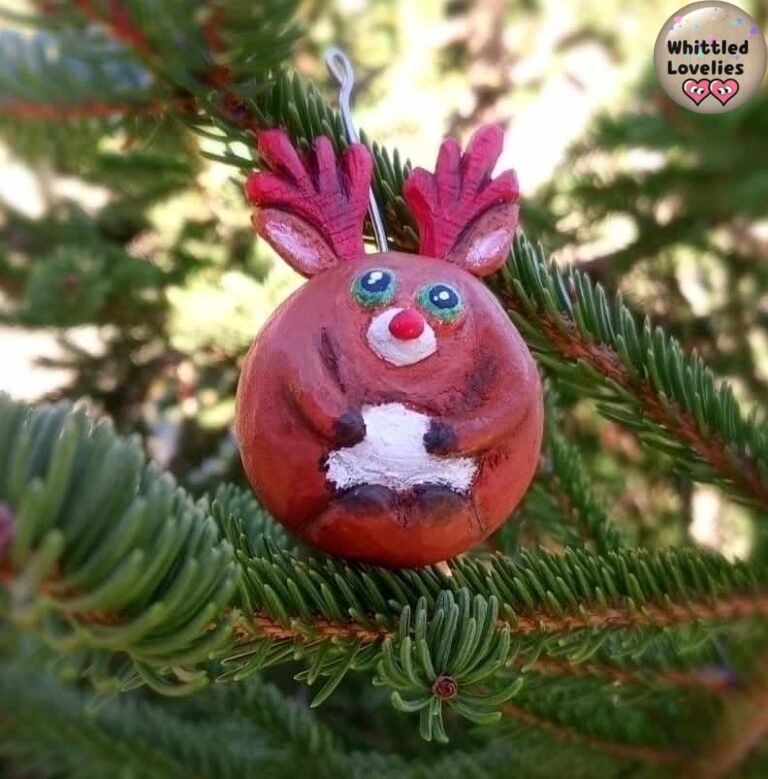
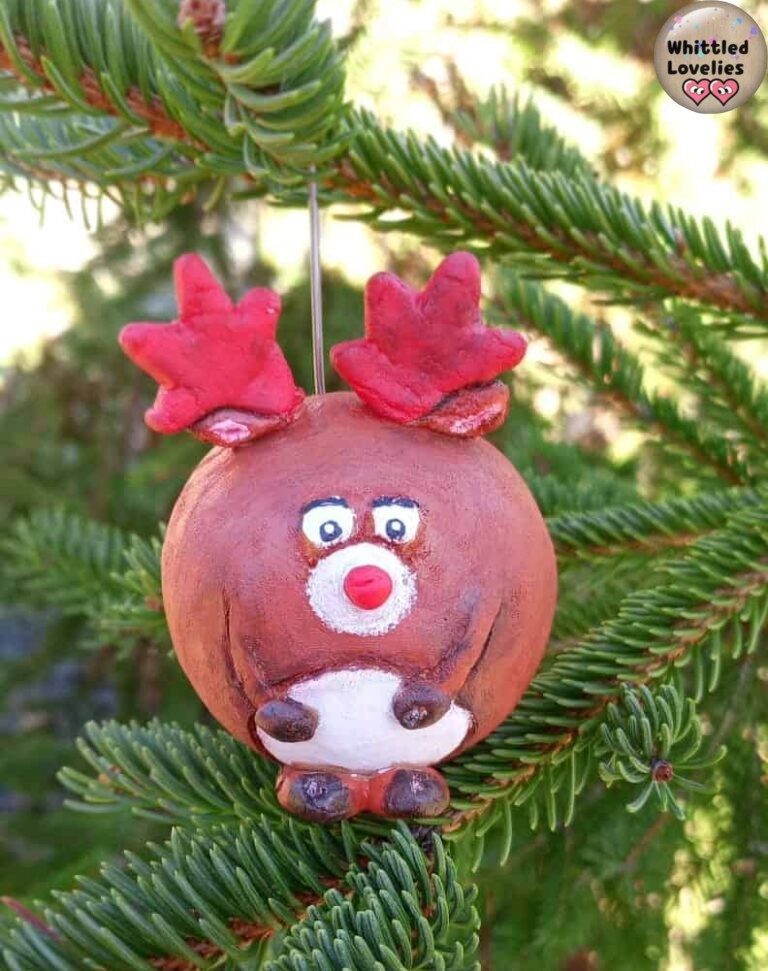
Here are my finished balls, Rudolph crazy eyes and sweet Rudolph. As you can see just by trying different ways of coloring the eyes you can achieve different results in expressions.
These two balls of mine also fit on a table, perhaps for a centerpiece, because of the balance in the feet, but in case you want them hung, just poke a very central hole and put a wire down.
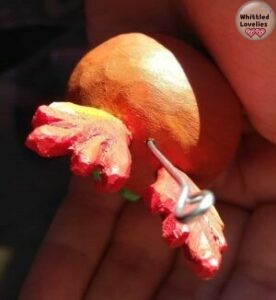
I hope again this year to have suggested something that will beautify your homes or make your friends happy in receiving them. If you still need any suggestions, I leave you the link to a new friend of the Blog, whose video will teach you how to create a beautiful Christmas lamp.
Or, how about reading the article from last Christmas? Maybe you missed it or didn’t get around to trying all the projects!
Christmas decorations: let’s design them!
I wish you peaceful hours in the company of your new projects for Christmas and as always I will be super happy to receive your messages, comments, doubts or simply your work that you can show in the Facebook group linked to the blog: Showcase woodcarving group.
See you soon! 😘😘😘
This is an article written by a human for humans!
All articles in the blog are written by me. No contributors, no people paid to write content for me.
Posts written by guests or friends of the blog are marked under the title with the words “guest post.” These are friendly collaborations, contributions to the carving community.
No AI (artificial intelligence) support is employed in the writing of blog articles, and all content is made with the intent to please humans, not search engines.
Do you like my content?
Maybe you can consider a donation in support of the blog!

Click on the button or on the link Ko-fi to access a secure payment method and confidently offer me coffee or whatever you want!
From time to time, in articles, you will find words underlined like this, or buttons with the symbol 🛒. These are links that help deepening, or affiliate links.
If you are interested in a product and buy it suggested by me, again at no extra cost to you, you can help me cover the costs of the blog. It would allow me to be able to give you this and much more in the future, always leaving the content totally free.


really enjoy your work and instructions
Thank you very much! I am extremely happy that you like my work and find my explanations helpful. Thank you for your comment, all the best!