Easter tutorial:
the rabbit hole!
Published on: March 29, 2022
Reading time: 10 minutes
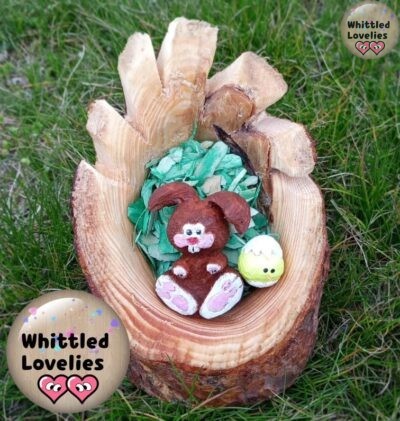
Hello and welcome back to everyone, sorry for the delay, which sometimes happens, but we are still in time to prepare a beautiful decoration to use as a table centrepiece or as a gift for Easter! Nice, creative and original, I have created exclusively for you the rabbit hole!
I had actually planned to make a photo tutorial to create a nice object to give as a gift: a rabbit that appears from inside an Easter egg. I already had the sketch and prepared the wood with the shape ready to carve. Then I spent a few days thinking about it, it seemed nice but maybe a little too bizarre. But the really bizarre thing is that one morning I woke up and found a notification from Doug Linker’s youtube channel.
What can I say, I was stunned… it was far too similar to my idea! I could have gone my own way and still published the article as I had imagined it… But after the article about respecting intellectual property, it really seemed to be making fun. Go to explain an unexplained coincidence! 😂
I would like to take this opportunity to thank everyone who commented on the article on social networks. I’m glad that some agreed with me and I’m also glad for those who showed doubts and perplexities and exposed them. This is the real intent of the articles, to open up discussions and to be able to talk about the topics from every point of view! Thank you for your attention!
Coming back to us, I’ll show you the pictures, at least you’ll realise for yourself how life can sometimes really make fun of us!
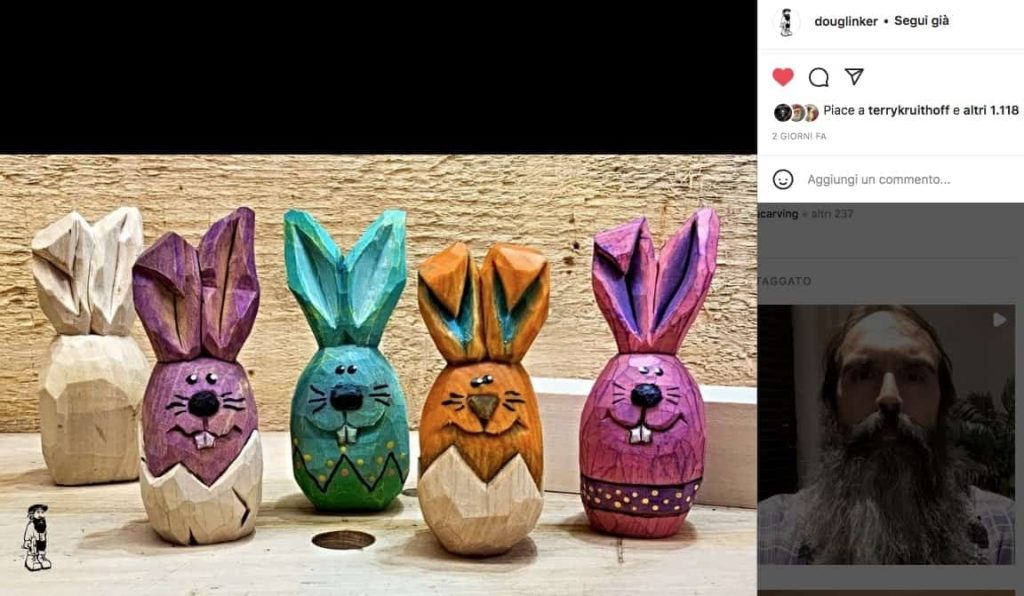
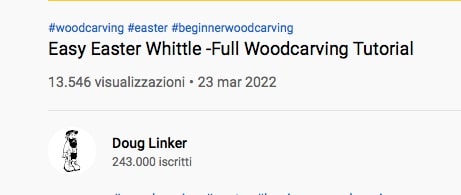
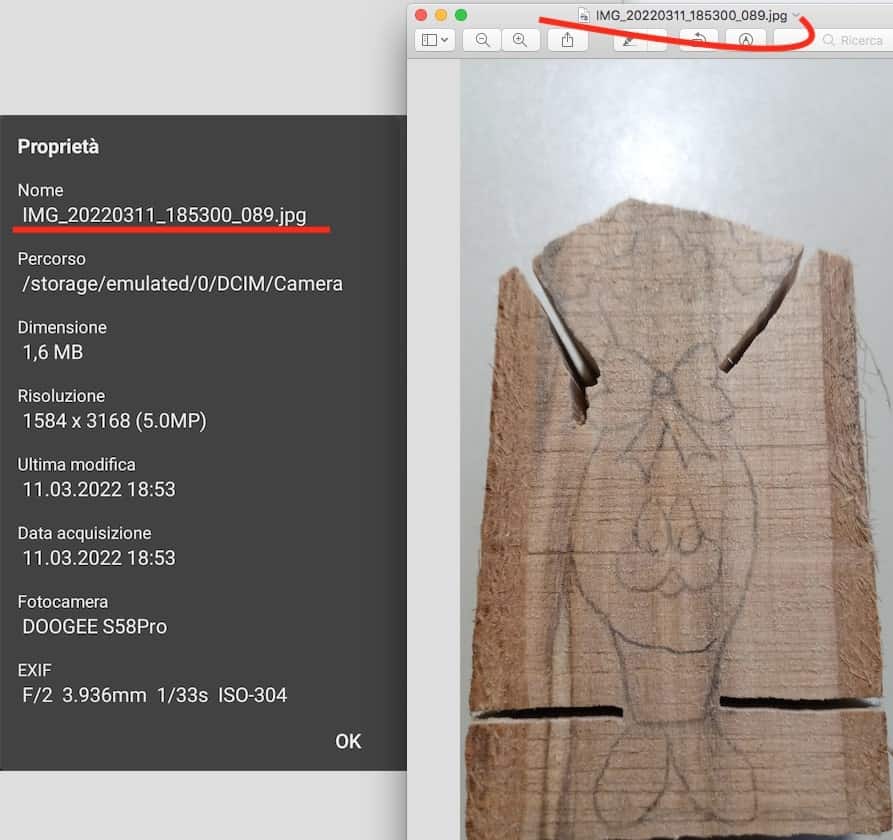
I was undecided about the ears, in fact on the sketch I had drawn them and then deleted, then opted for the Easter egg bow. I wanted more egg and less bunny, but I have to say we really had some mental connection! 😎😉😂
For those who want to try their hand at my aborted mission, I leave you the sketch to improve, print and use, the idea wasn’t bad apparently! 😉😌😂
The unforeseen events that happen always leave us a little unsettled, it’s normal, but just enough time to react and here’s a new idea, and if I have to tell you, I like it better than the first one I had, plus it’s definitely more complete. So sharpen your knives, we have a lot of work ahead of us!
Materials, costs and estimated time
Let’s start with the den!
Choose a nice piece of pine wood (Pinus). I chose this particular type of wood because when cut it is very fragrant, compact and durable and has a beautiful bark that lasts. We also need the bark to give the effect of a hidden den.
I have given you the dimensions I used for this project, obviously they are entirely indicative, you can modify them as you like, just remember to think about the size of the rabbit that will have to fit inside the trunk and choose accordingly.
I started by making a cross cut with a handsaw along almost the entire length of the trunk. Then I made decorative cuts in the thinner part with a hacksaw, widened and shaped with the help of a gouge.
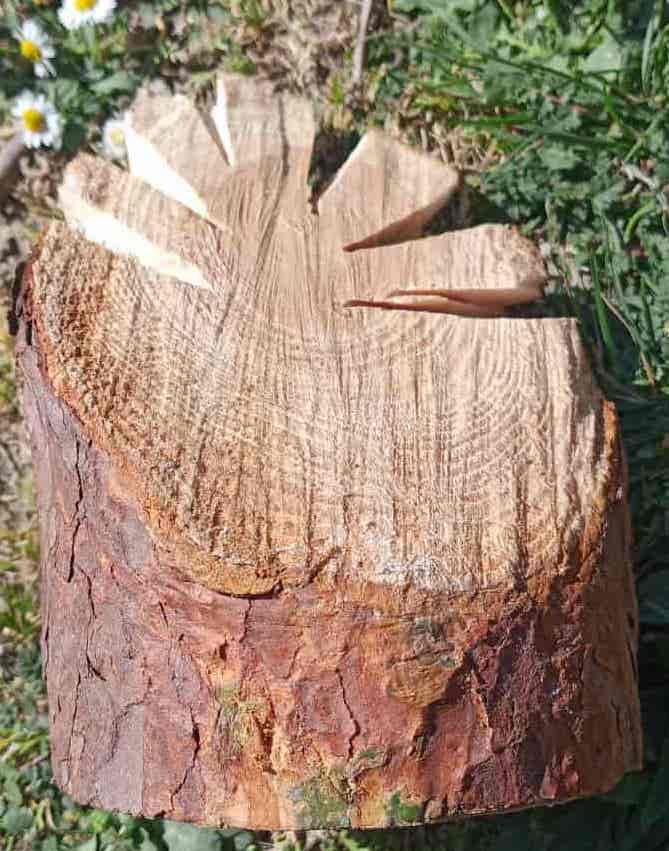
Always remember the size of the rabbit you want to create and prepare a design that is appropriately large. I advise you to be generous with the border, so draw it fairly thick. The fact that it is not thin serves the image and then on the practical side the wood is not weakened and there is less chance of breakage.
Start digging, what we want to do is make a C-shape inside the trunk. This is the shape we’re inspired by, so we’re going to eat more wood in the lower part and it’s just going to be a little hollow for the upper part. Help yourself with any tools you have available because it’s going to be a long job.
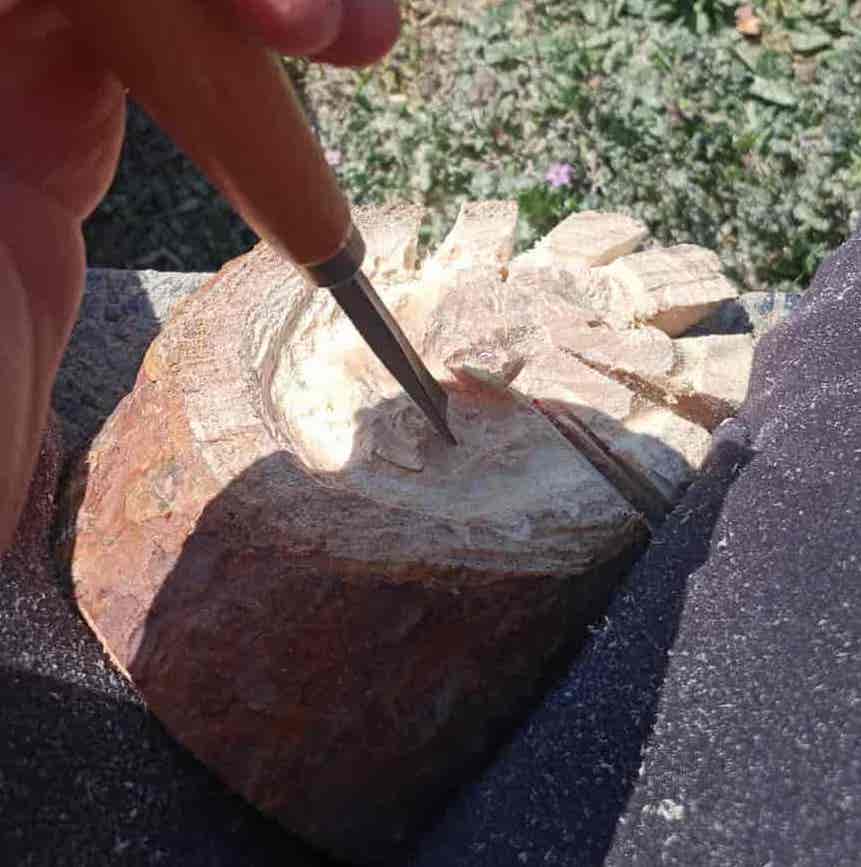
Using the gouges and a hammer you can proceed quite quickly, if you have a Dremel type drill you can help yourself with wood rotary burrs. Just remember that if you have used pine, as suggested, it is very resinous so clean the tools well with alcohol or turpentine after use or they will be useless in the future.
When you have dug out a hollow about 5/5.5 cm deep and 6/6.5 cm wide, you are there. Take some time to create a cosy cove, without any edges, inspired by the shape of a drop. Wipe the whole thing with glass paper to make it smoother.
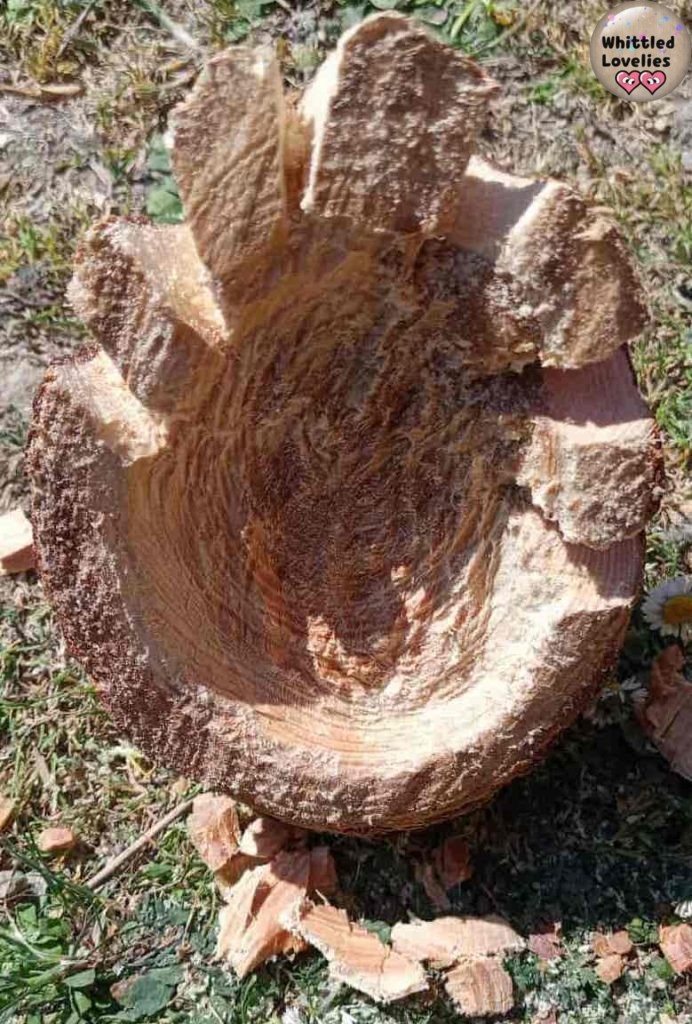
It doesn’t really matter if the background is perfect, the glass paper finish is mainly for smoothing the edge which will remain visible. The inside will then be lined with wood chips that you have created in this project or some previous ones, so be careful what you throw away!!!
Ladies and gentlemen, here’s the rabbit!
It doesn’t come out of a magician’s cylinder, but the real magicians are you who will create it from a simple block of wood, Geppetto scoot over! 😏😝 Start by downloading and printing the sketch, or create your own.
The most important thing is that it has an oval shape, creating the paws. The rabbit’s butt should be seated inside the trunk, so it should be as shaped as possible. In addition, it will be interesting for children to play with when they notice that the rabbit is swinging when it is pulled out of its burrow, while remaining comfortably seated!
Start by making the sketch directly on the wood, if you are unfamiliar with it read and use one of the methods described in this article. I used a 6 cm high and 4 cm wide piece of privet wood (Ligustrum vulgare).
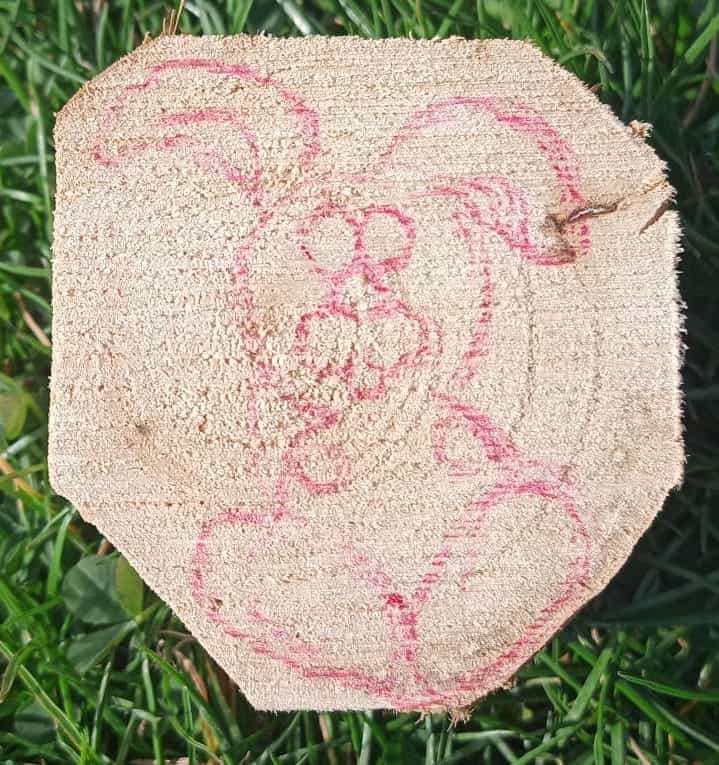
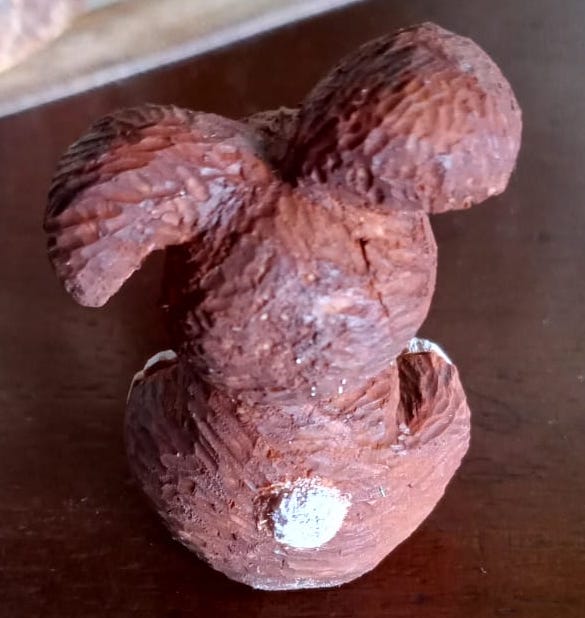
We cut out as much of the contour as possible, either by hand or with a band saw, and start on the simplest part, the back. Starting with the back is easier to achieve the correct 3D dimension as the details are normally found on the front. We start by finding the point of the neck, shape the head and the ears. Then we go down to level the bottom of the back, remembering to create a funny little tail.
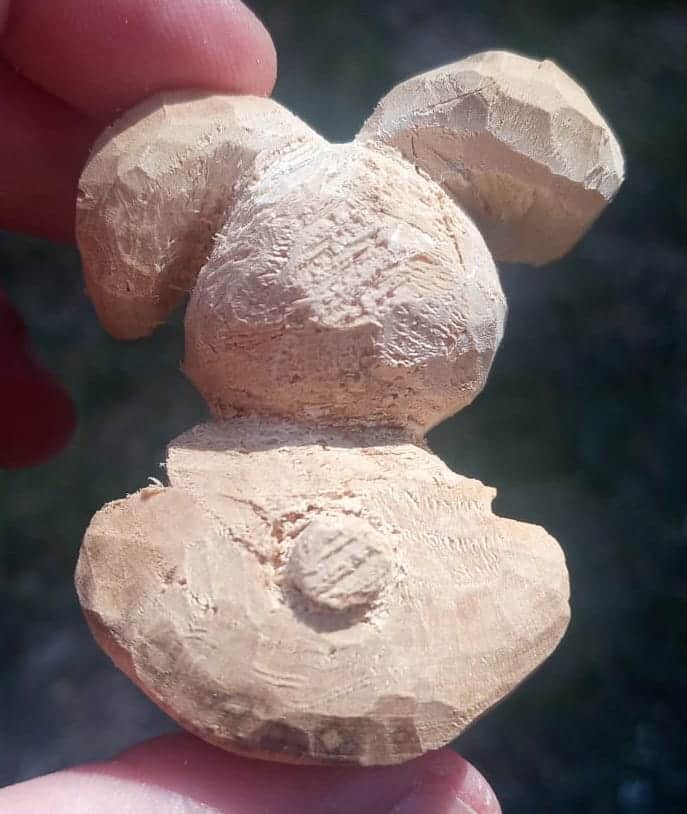
Let’s move on to the front, with simple and light v-cuts (if you don’t know the 4 basic cuts read this article) we define the paws and the muzzle. With precise sweep-cuts we thin out the area around the muzzle, shape the head, better define the ears and their movement.
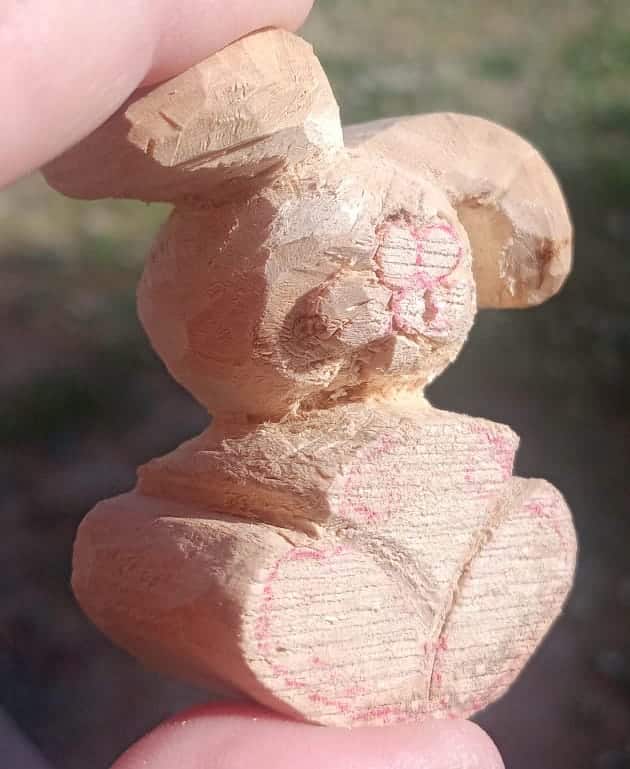
With a precision gouge we hollow out the inside of the ears. You can also do it with a knife, but it is more complicated and you need a detail knife. I find this operation infinitely simpler, faster and more precise when done with a palm gouge. In this case I used a 1mm micro oval shaped bit.
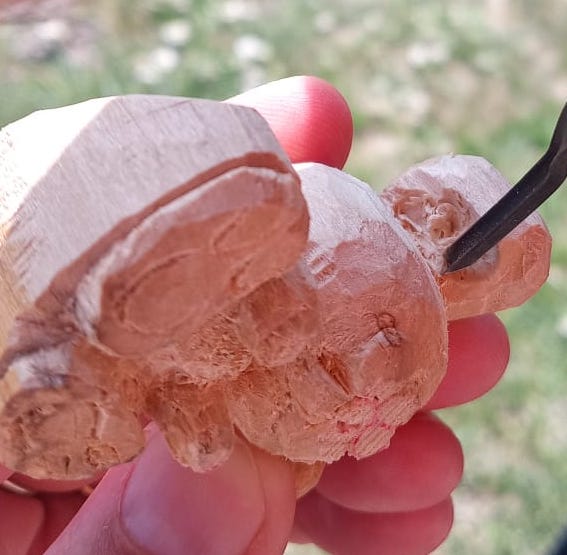
As you can see from this photo, with a deeper v-cut, we define the feet by separating them clearly from the legs. We then also create the pads. We cut and trim the part around the front legs. They will be very simple, without any particular detail, also because they will be about 2mm in diameter. When dealing with such small portions of wood it is better to draw a detail with colour rather than define it with a knife as the risks of breaking are too high.
As I was telling you before, this wood, also because it comes from a relatively young tree, is not resistant to close cuts and creates a lot of places where the cut is frayed. Passing it with sandpaper only partially curbs the problem so, of necessity virtue, we create a fun pattern of hair that will cover all the unwanted porosity and leave the object embellished with a more particular texture even to the touch.
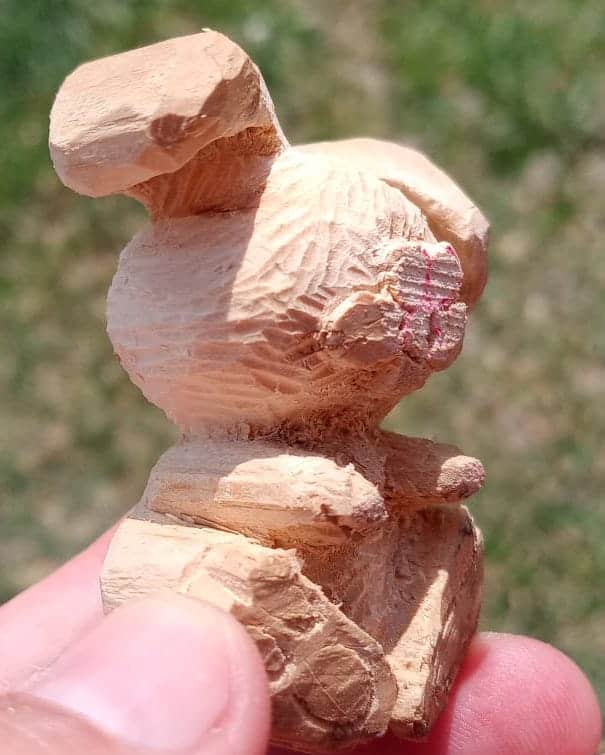
To create this hair effect, take a very small precision gouge, 1mm is ideal, in a V shape and make micro irregular strokes. I don’t recommend always going in the same direction or making too long strokes as you lose a lot of the effect. Start and see how it goes, the important thing is that the strokes are very close together.
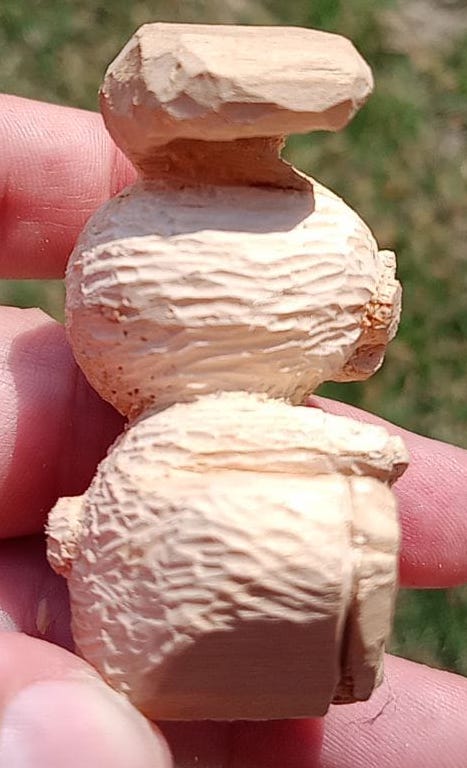
Once this delicate operation is finished, even on the upper surface of the ears, we check that the part of the butt is suitable for sitting inside the trunk. If not, it’s the last moment to make the necessary corrections or devote ourselves to creating other details. So now we are finally ready to….
…Colouring!
Let’s take a look at our den made from pine logs. Although this is a wood that naturally protects itself from pests thanks to the presence of its resin, a touch of linseed oil provides additional protection against dehydration and makes the grain beautifully shiny. So we only apply a light coat to the carved part.
While we’re holding the linseed oil in our hands, the bunny will be happy to receive a generous dab of it everywhere. His wood is not pine, it needs protection and brightness. We also need it to have a gentle effect with the colour. We cannot apply a colour that is too thick or we will lose the texture of the rabbit’s coat.
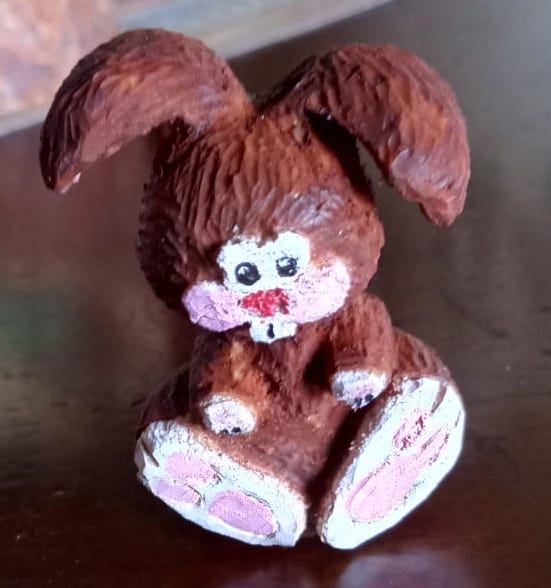
Once the two pieces are dry, we move on to colouring the parts of the raised muzzle. I always like to start with the lighter details and continue with the darker colours. This helps me to cover up any damage or mistakes I may have made with the colour beforehand. So I paint the cheeks, nose and eyes with a thick covering white. On the inside of the ears, on the tips of the front legs, on all the hind legs and on the tail.
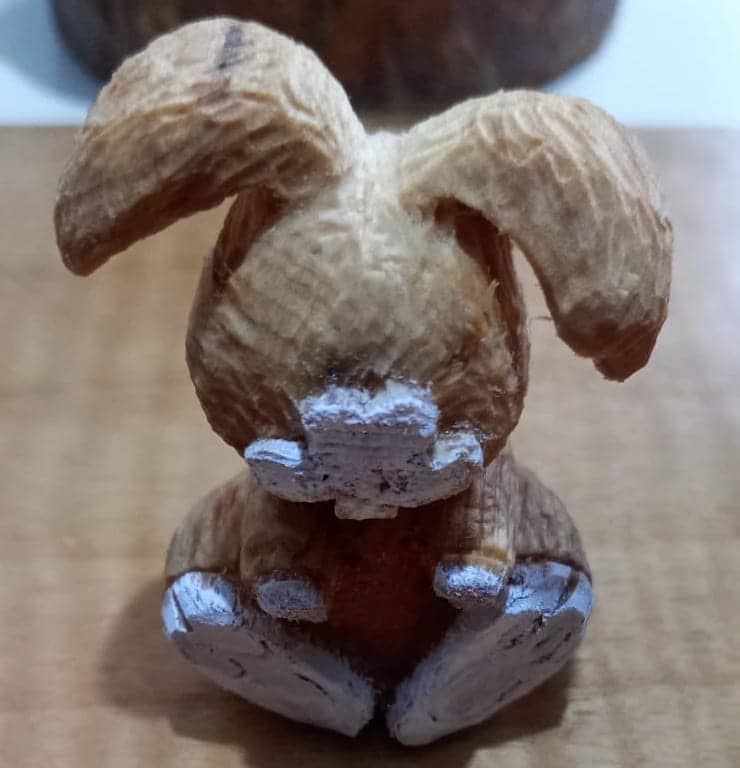
The colour I have created for the coat is a mix of burnt sienna (a very red brown) and raw umber (a dark brown). To this mix, or to your colour, you will need to add a lot of water and apply it not as a thick coat but more by absorption. The wood will absorb the right amount of colour and it will also be regulated by the linseed oil you put in beforehand, which acts as a barrier.
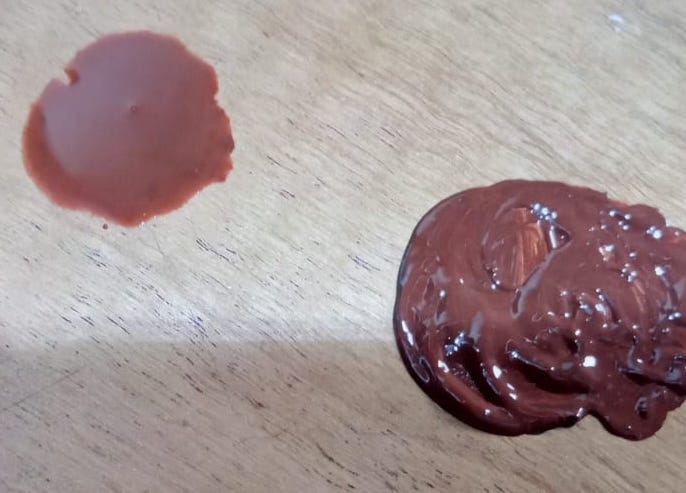
The colour given in this way takes on a particular naturalness. Don’t worry if you find it too dark at first, it will normalise in a few minutes and you can still touch up the colour if you wish.
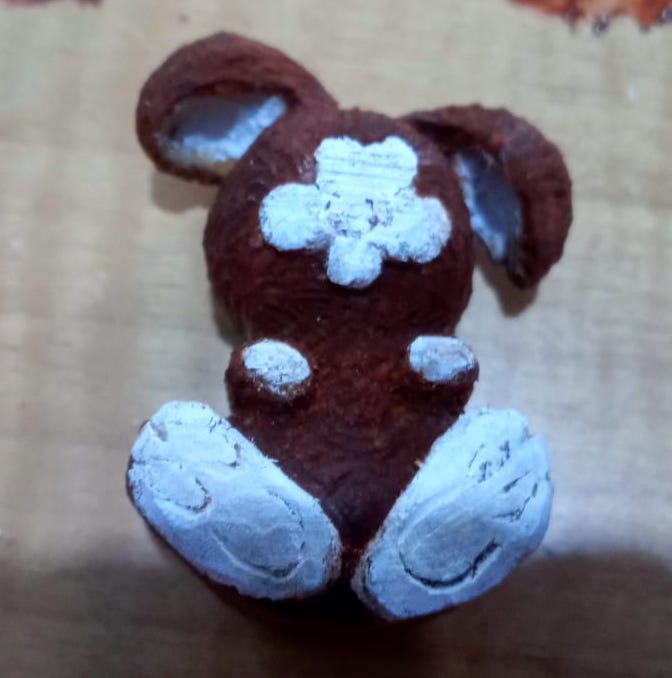
You will see that it dries in an instant and you can immediately start colouring the cheeks, the fingertips and the inside of the ears with a soft pink. For the nose, I opted for a vermillion red to give a touch of colour. Having done the eyes with a very fine brush tip, our protagonist, Mr Rabbit, is also finished!
Final touches
To aid the housing of our new rabbit friend and to vary the colour a little, we take wood chips, you’ve saved them haven’t you!🧐🤔
Once you’ve measured how many you’d like to use, put enough water in a container to cover them completely.
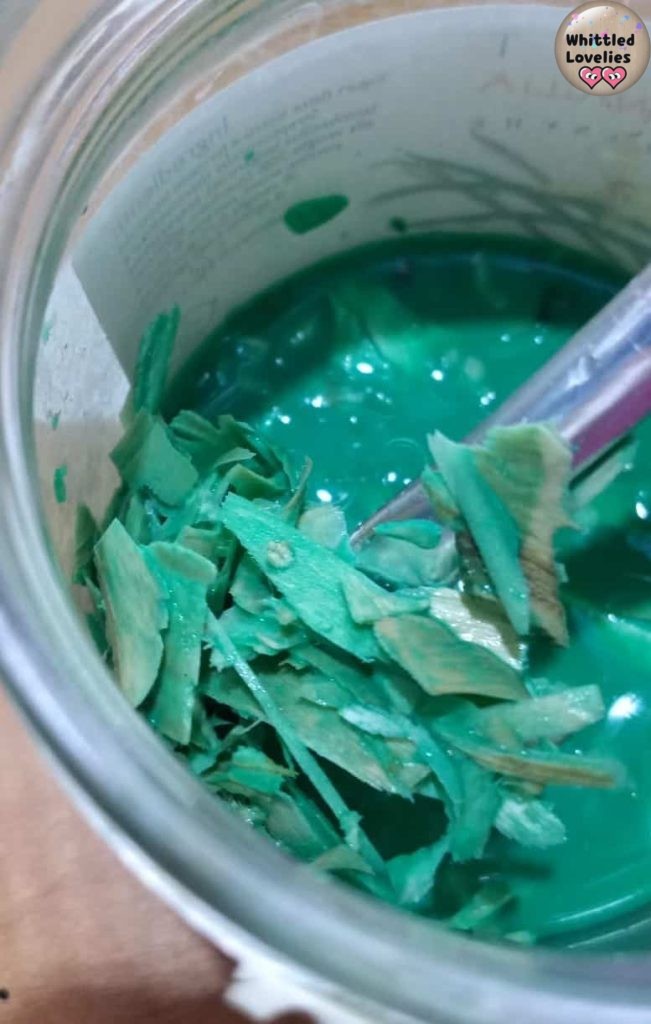
Prepare some colour, I used emerald green, mix it in the water until it is completely dissolved. Once you are satisfied with the colour shade, dip the chips in and with the help of a brush make sure that they are all turned around and covered in the coloured water. Now let them rest.
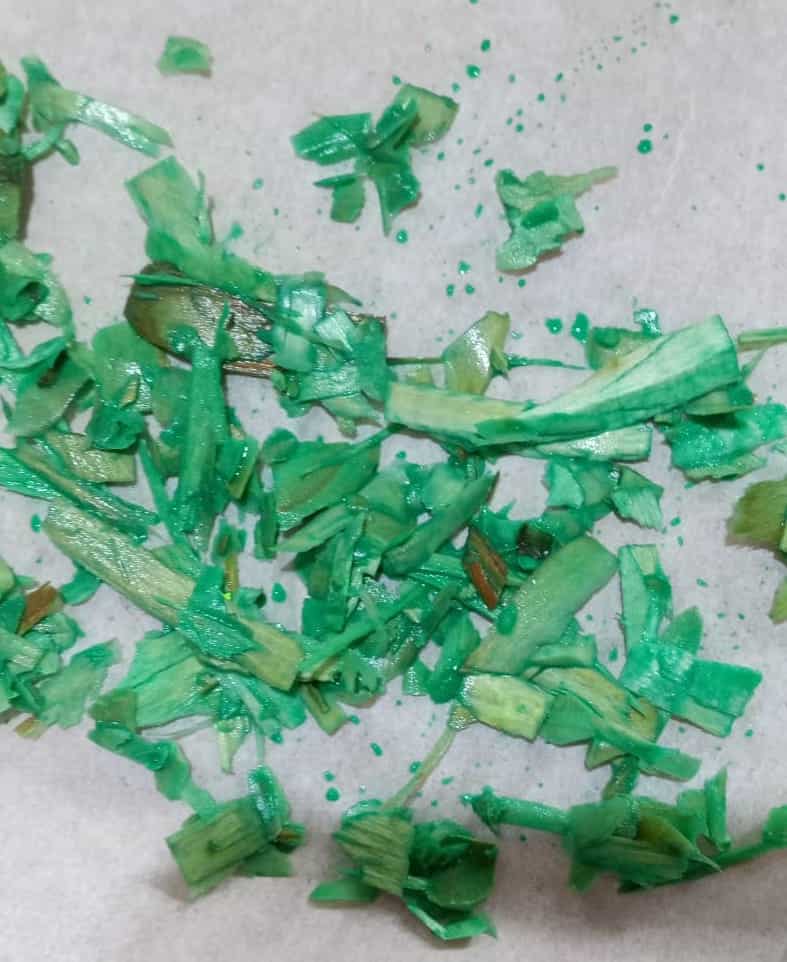
I wanted the colour to be very soft and the wood to retain a little yellow in places, to give a little more reality and the impression of grass. So I let the chips soak for half an hour. The timing and gradation of colour is up to you. After the time that you consider necessary, drain the shavings and put them to dry on baking paper. This will prevent them from sticking when dry.
Let’s get the rabbit hole ready for its arrival!
Once dry we apply a generous hand of vinyl glue to the inside of the burrow and arrange the chips evenly and fluffily. If the burrow has been hollowed out correctly they won’t slide down, but if they do, use a bit of drawing fixative spray, it will gloss up and help keep even the most unruly wood shavings at bay.
If you follow my advice to leave the part under the tail in a semi-circle as you see in the picture, the rabbit will swing out of the burrow and will not only be decorative but also a nice toy for children.
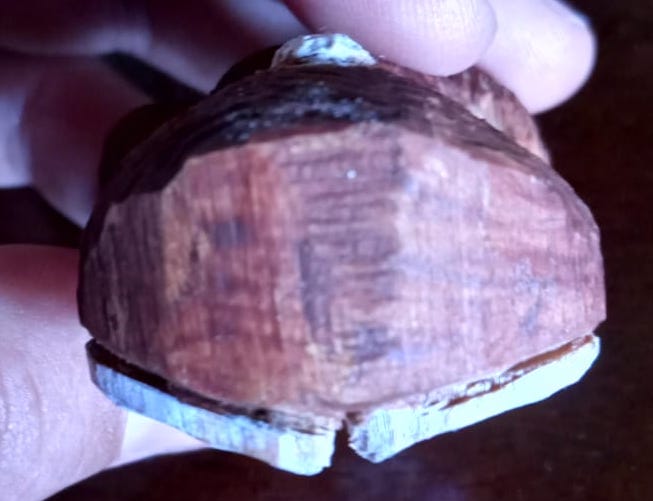
But once the rabbit is in the hole, voila! Our Easter project is finished!!!
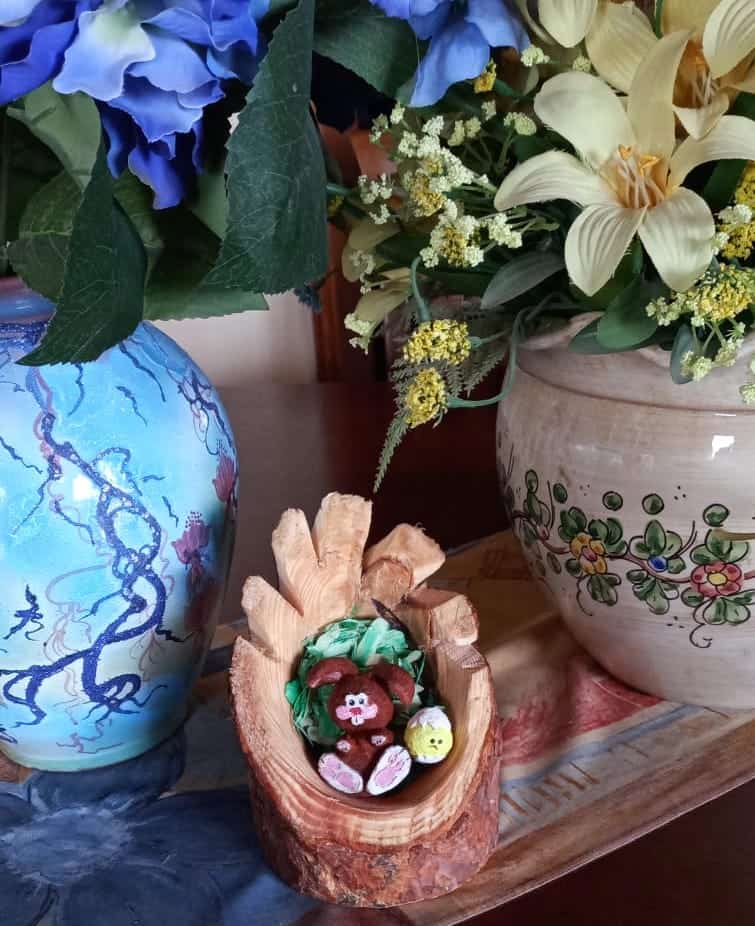
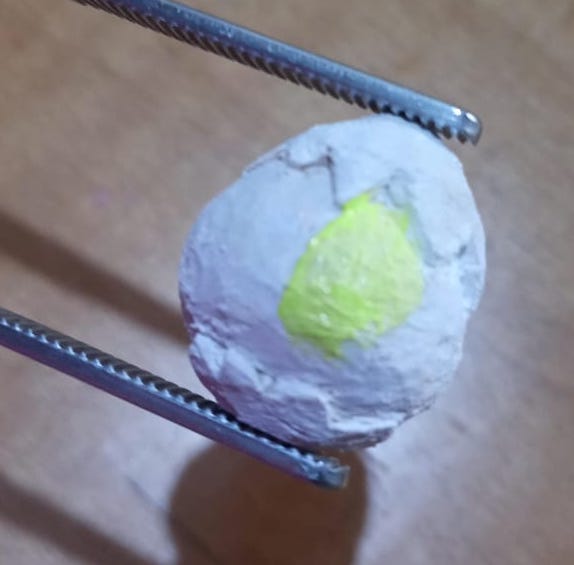
But what’s that little yellow thing? 🤔😰 I still had a little leftover wood, so I made a millimetric egg out of it and made a stylised chick still in its shell. The beak is a piece of wood chip, and to colour it I helped myself with kitchen tongs. Whatever your imagination suggests will be perfect for making this project your own.
Conclusion
This work is a bit of an advanced level. But what I recommend is to give it a try. The fact that you have a photo tutorial also helps you to see that it is not as difficult as you might think. If, on the other hand, you want to try your hand at something simpler, why not go check out this other Easter tutorial or more complicated, how to create a mechanized easter egg?
More details or less details will still make your project a success because you made it with your heart and your hands. Always remember that handmade things have an incalculable value and whether you turn it into a gift or show it off as a table centrepiece for Easter lunch, you’re sure to make a great impression!
I hope you enjoyed this tutorial. In case you decide not to use it, I hope you found some interesting ideas in the descriptions or something you would like to try on your future projects. In any case, you know, I’m extremely pleased to know what you think! I look forward to your comments and wish you a special Easter! Bye! 😘😘😘
This is an article written by a human for humans!
All articles in the blog are written by me. No contributors, no people paid to write content for me.
Posts written by guests or friends of the blog are marked under the title with the words “guest post.” These are friendly collaborations, contributions to the carving community.
No AI (artificial intelligence) support is employed in the writing of blog articles, and all content is made with the intent to please humans, not search engines.
Do you like my content?
Maybe you can consider a donation in support of the blog!

Click on the button or on the link Ko-fi to access a secure payment method and confidently offer me coffee or whatever you want!
From time to time, in articles, you will find words underlined like this, or buttons with the symbol 🛒. These are links that help deepening, or affiliate links.
If you are interested in a product and buy it suggested by me, again at no extra cost to you, you can help me cover the costs of the blog. It would allow me to be able to give you this and much more in the future, always leaving the content totally free.
