Wood Carving: The Easter Bunny…
Butt First!
Published on: March 15, 2025
Reading time: 7 minutes

Guys, here we are! Easter is almost here! Before starting my project, I took some time to think about what to do, and I came to two conclusions. The first is that there are mainly two types of people: those who, at this time of year, start thinking about elegant floral arrangements to decorate their homes and those who have fun carving an Easter bunny. I am definitely in the second category, and you? 😉😌
If you’re still here with me, you’ve made an excellent choice… mainly in category! 🤣 After last year’s engineering adventure, this Easter, I wanted to keep it simple and create a project suitable for everyone. Especially for those who received a wood carving knife set for Christmas and can’t wait to use it for the first time!
A Bunny, a Hole, and a Comedic Scene
So, here’s my second conclusion: if Easter were a comedy, a bunny with its head stuck in a hole would be the perfect protagonist! Imagine the scene: a curious little bunny, perhaps a bit too optimistic about its ability to fit anywhere, ending up head down and paws up. It’s not just a funny idea, but also the perfect carving project for those who want to try something fun and accessible to all.
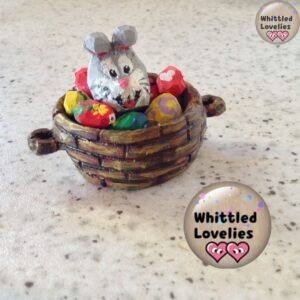
As you can see from the cover photo, I chose something non-technical and quick, but that never loses sight of its main purpose: to make both the carver and the viewer smile! A good gift is already halfway there if it brings a laugh!
How an Easter Bunny is Born
Every year, I love creating something new for Easter, something that brings a bit of lightheartedness. I don’t know why, but I’ve always seen Easter as a fun holiday, full of games, company, and the first beautiful outdoor days.
After the success of my super simple project from two years ago:
Tutorial: the Easter bunny
…I thought: Come on! It deserves a worthy sequel. Let’s complete this bunny! And so, here it is, but seen from behind! Same simplicity, perhaps even more, quick and highly customizable.
I love projects that tell a story. An object can be as beautiful as you want, but if it doesn’t have a soul, if there’s no little story behind it, it remains just a decoration. And this Easter bunny is a little visual joke: you’d expect to see its cute face, upright ears, maybe a bow… but nope! It’s already gone. Or at least, it’s trying! 😂
I imagined it diving into Easter eggs in the garden before the treasure hunt, but you can place it wherever you like: in a flower pot, in the Easter basket from two years ago (you can find the template here on the blog, along with many other projects). Wherever your imagination tells you to go—go! Or send the bunny instead! 😂
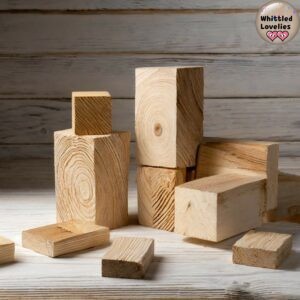
Materials and Tools: What You Need
A simple project requires simple necessities!
If you want to go fast
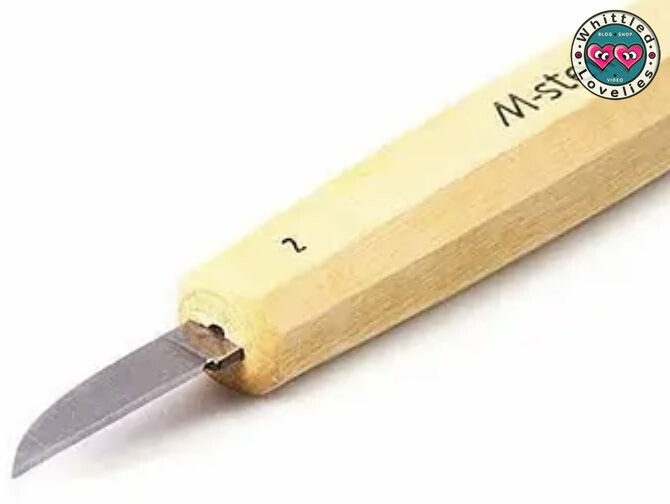
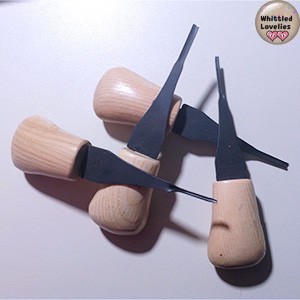
If you have them, use them to help!


Step by Step:
From a Piece of Wood to a Bunny Butt! 🤣
1️⃣ Draw the Model (No Perfectionism Allowed!)
Before you start carving, take a sheet of paper and sketch the bunny’s outline. Just draw a teardrop shape, you don’t need to be an artist! Place the tail at the top and the paws just below. The exact details don’t matter—the real shape will emerge as you work.
I started with a scrap piece of wood from another project, traced a rough outline of the bunny’s backside with a pencil: two feet, a round tail, and a slight curve for the back.
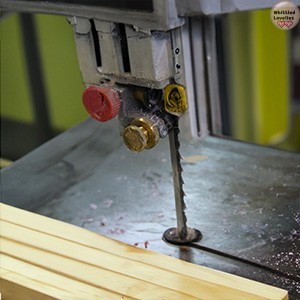
2️⃣ Cutting and Rough Shaping: The Moment of Truth
Now comes the fun part. Use a bandsaw (or a scroll saw) to cut out the shape, removing the excess without rushing. If you’re working only with a carving knife, go layer by layer—don’t try to remove too much material at once. Better to be patient than to start over!
💡 Tip: Start from the edges and work your way inward. If the wood tends to splinter, try adjusting your cutting angle.
This step is all about rounding and creating that cute, plump little bunny butt! Nothing difficult. I suggested a teardrop shape because the body naturally tapers, making it easier to hide among the eggs and keeping the illusion that the head is really underneath.
One thing to consider is where you want to place it. I opted for a shallow indentation so it would look like the bunny was kneeling, meaning I didn’t have to worry much about the feet. But if you want it sticking out of a vase or basket, the feet will be the main support.
💡 Trick: Make the feet wide and well-carved underneath so they act as a balancing hook. Also, consider the thickness of the vase or basket’s rim—the belly goes inside, and the bunny rests on its feet. This is key to keeping it stable!
🎥 Watch the video below to see this step in action — it’ll help you better understand the movements and the shape you’re going for:
3️⃣ Texture: The First Magic Touch!
Now that you’ve got the perfect shape and defined the tail (if you don’t plan to add wool or fibers), it’s time to create the fur texture! This will immediately take your project to the next level!
If you have a V-gouge, run it slowly and randomly over the whole body. No need to carve deeply—just make sure the lines are evenly distributed and fairly close together.
No gouges? No problem! You can achieve a similar effect with the tip of your carving knife. Work lightly, and protect your fingers—holding an oval shape is tricky!
💡 Want an extra touch? Poke the tail to create a fluffier, more natural effect. It’s up to you how playful you want it to look!

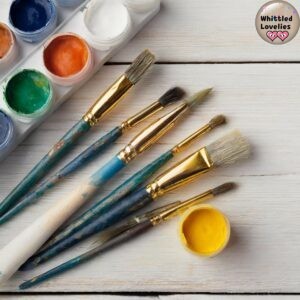
Decoration and Personalization
Now you can decide whether to leave the bunny natural or paint it. If you want to give it a more realistic or playful look, you can add paw details using a fine brush or attach small felt elements.
Whether you choose to leave it natural or paint it, I highly recommend applying a bit of linseed oil. It serves as a base for the color or simply as a protective finish, helping to enhance the fur texture.
💡 After wiping off any excess oil, I started with a diluted black base coat. Once dry, I applied a light dry-brushed layer of white to create gray shading, making the carved fur texture stand out beautifully.
As I mentioned, you can also apply carded wool to the tail for a fluffier, softer effect, or add pink felt pads to the feet—or simply paint them.
A Touch of Creativity: Recycling Wood Shavings
Those who have been following me for a while know that I love creative recycling, which is why I often use freshly cut wood shavings! They’re a quick and effective way to add movement and texture to projects.
For this piece, I wanted to recreate a patch of grass. You can do this in different ways, such as: Using carving gouges to repeatedly incise the wood, creating a textured surface. Coloring wood shavings and gluing them randomly onto the piece for a 3D, realistic effect.

Simply soak the shavings for a few hours in different shades of green (lighter or darker, depending on your desired effect). Once drained and fully dried on non-stick paper, they’re ready to be glued wherever needed! 😊
Tips to Avoid a Frustrating Experience
🔹 Don’t rush – Wood needs patience; forcing things will only lead to mistakes (and frustration!).
🔹 Practice on scrap wood first – If it’s your first time with a scroll saw or carving knife, test on leftovers before cutting the real piece.
🔹 Don’t underestimate the finish – A well-painted and protected project will last longer and look more professional!
This is a great exercise for developing manual skills and precision. If you’re just starting out, the hardest part is finding the right balance in cuts and proportions. But with this bunny, you get a simple, beginner-friendly shape that lets you experiment stress-free.
And it teaches you more than you think: Having fun with mistakes – A little flaw can turn into a unique feature. Creativity is in the details – The small stories we put into objects, and the satisfaction of holding something made with your own hands.
If you try it, let me know in the comments or share a photo of your bunny on Instagram! With just a few tweaks, you can place it anywhere while keeping its fun spirit alive! Happy Easter and happy carving! 🐰
This is an article written by a human for humans!
All articles in the blog are written by me. No contributors, no people paid to write content for me.
Posts written by guests or friends of the blog are marked under the title with the words “guest post.” These are friendly collaborations, contributions to the carving community.
No AI (artificial intelligence) support is employed in the writing of blog articles, and all content is made with the intent to please humans, not search engines.
Do you like my content?
Maybe you can consider a donation in support of the blog!

Click on the link Ko-fi to access a secure payment method and confidently offer me coffee or whatever you want!
From time to time, in articles, you will find words underlined like this, or buttons with the symbol 🛒. These are links that help deepening, or affiliate links.
If you are interested in a product and buy it suggested by me, again at no extra cost to you, you can help me cover the costs of the blog. It would allow me to be able to give you this and much more in the future, always leaving the content totally free.